🚀 How to create and configure a Review in Zest?
Zest’s Evaluation module allows you to structure and digitize all your review campaigns: annual performance reviews (EAE), regular follow-up meetings, onboarding reviews, and much more. This article guides you step by step through creating, configuring, and launching a review, from activating the feature to managing the results.
🔐 Prerequisites – Activation and access rights
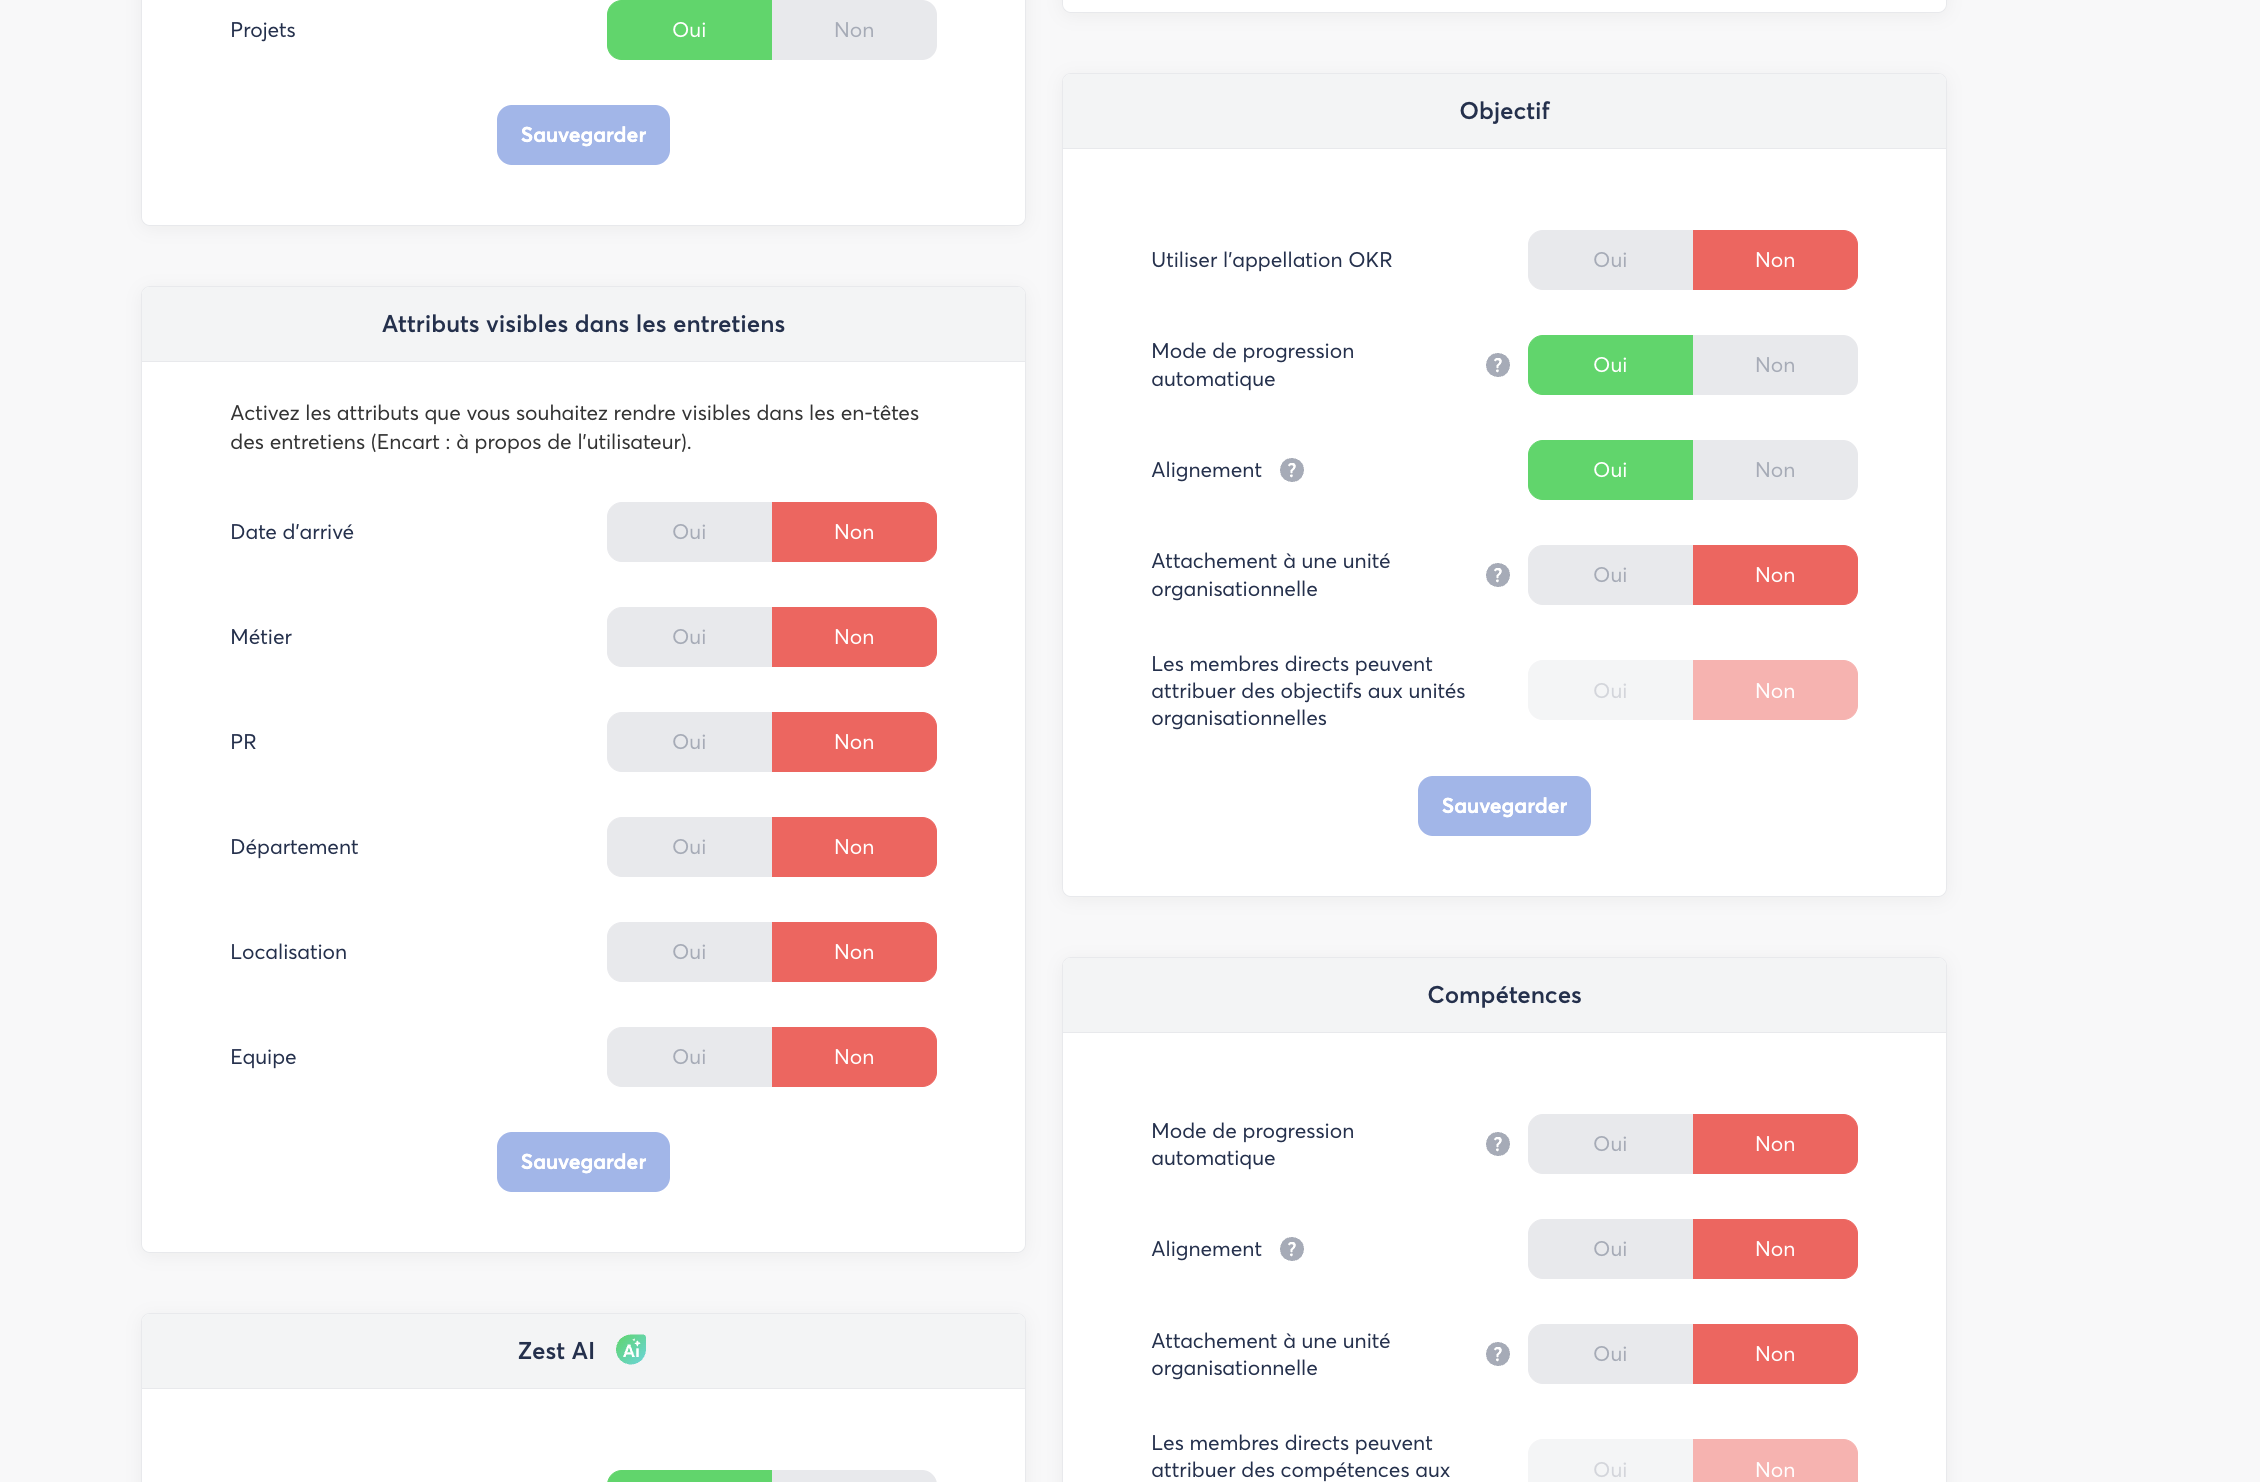
If you want to use advanced questions related to Objectives or Competencies, also activate these modules in the same section.
Configure access rights
Still in the Back Office, go to Rights > the Succeed tab to configure who can do what in the Evaluation module.
Technical prerequisites depending on the questions used
Depending on the types of questions you wish to include in your template, additional prerequisites may apply before launching the campaign:
- Advanced Objectives questions: Year N objectives must be imported or created in Zest with the appropriate status (Completed, On Track, etc.) in order to appear in progress and evaluation questions.
- Advanced Competencies questions: Competencies must be imported, created, and assigned to employees.
- Performance Objectives question: Performance objectives must be imported via an Excel file provided by your Zest CSM. The type column must contain the value
perf_goal, and the perfTag field must exactly match the tag used when configuring the question in the template.
- Training Evaluation question: Trainings must first be imported into Zest using a standard import file provided by your CSM, or created through the Training Requests question.
👉 For any questions regarding imports, please contact your Zest Customer Success Manager.
🧱 The participants in the Review
Before creating your review, it is important to understand the roles involved:
| Participant | Description |
|---|---|
| Employee | The subject of the review. They answer the questions during the response period and then validate the review at the end of the campaign. |
| Contributor | The employee's evaluator. This is generally their direct manager (N+1), second-level manager (N+2), a Department Admin, or a Location Admin. They comment on and evaluate the employee's answers during the contribution period. |
| Owner | The person who configures and launches the review (HR, manager, SuperAdmin, depending on the permissions granted in the Back Office). |
A review can include several contributors per employee (multiple contributors). In this case, all contributors must have finalized their contribution before the employee can validate their review (or until the contribution period has ended).
🚀 Create a Review – Step 1: Define
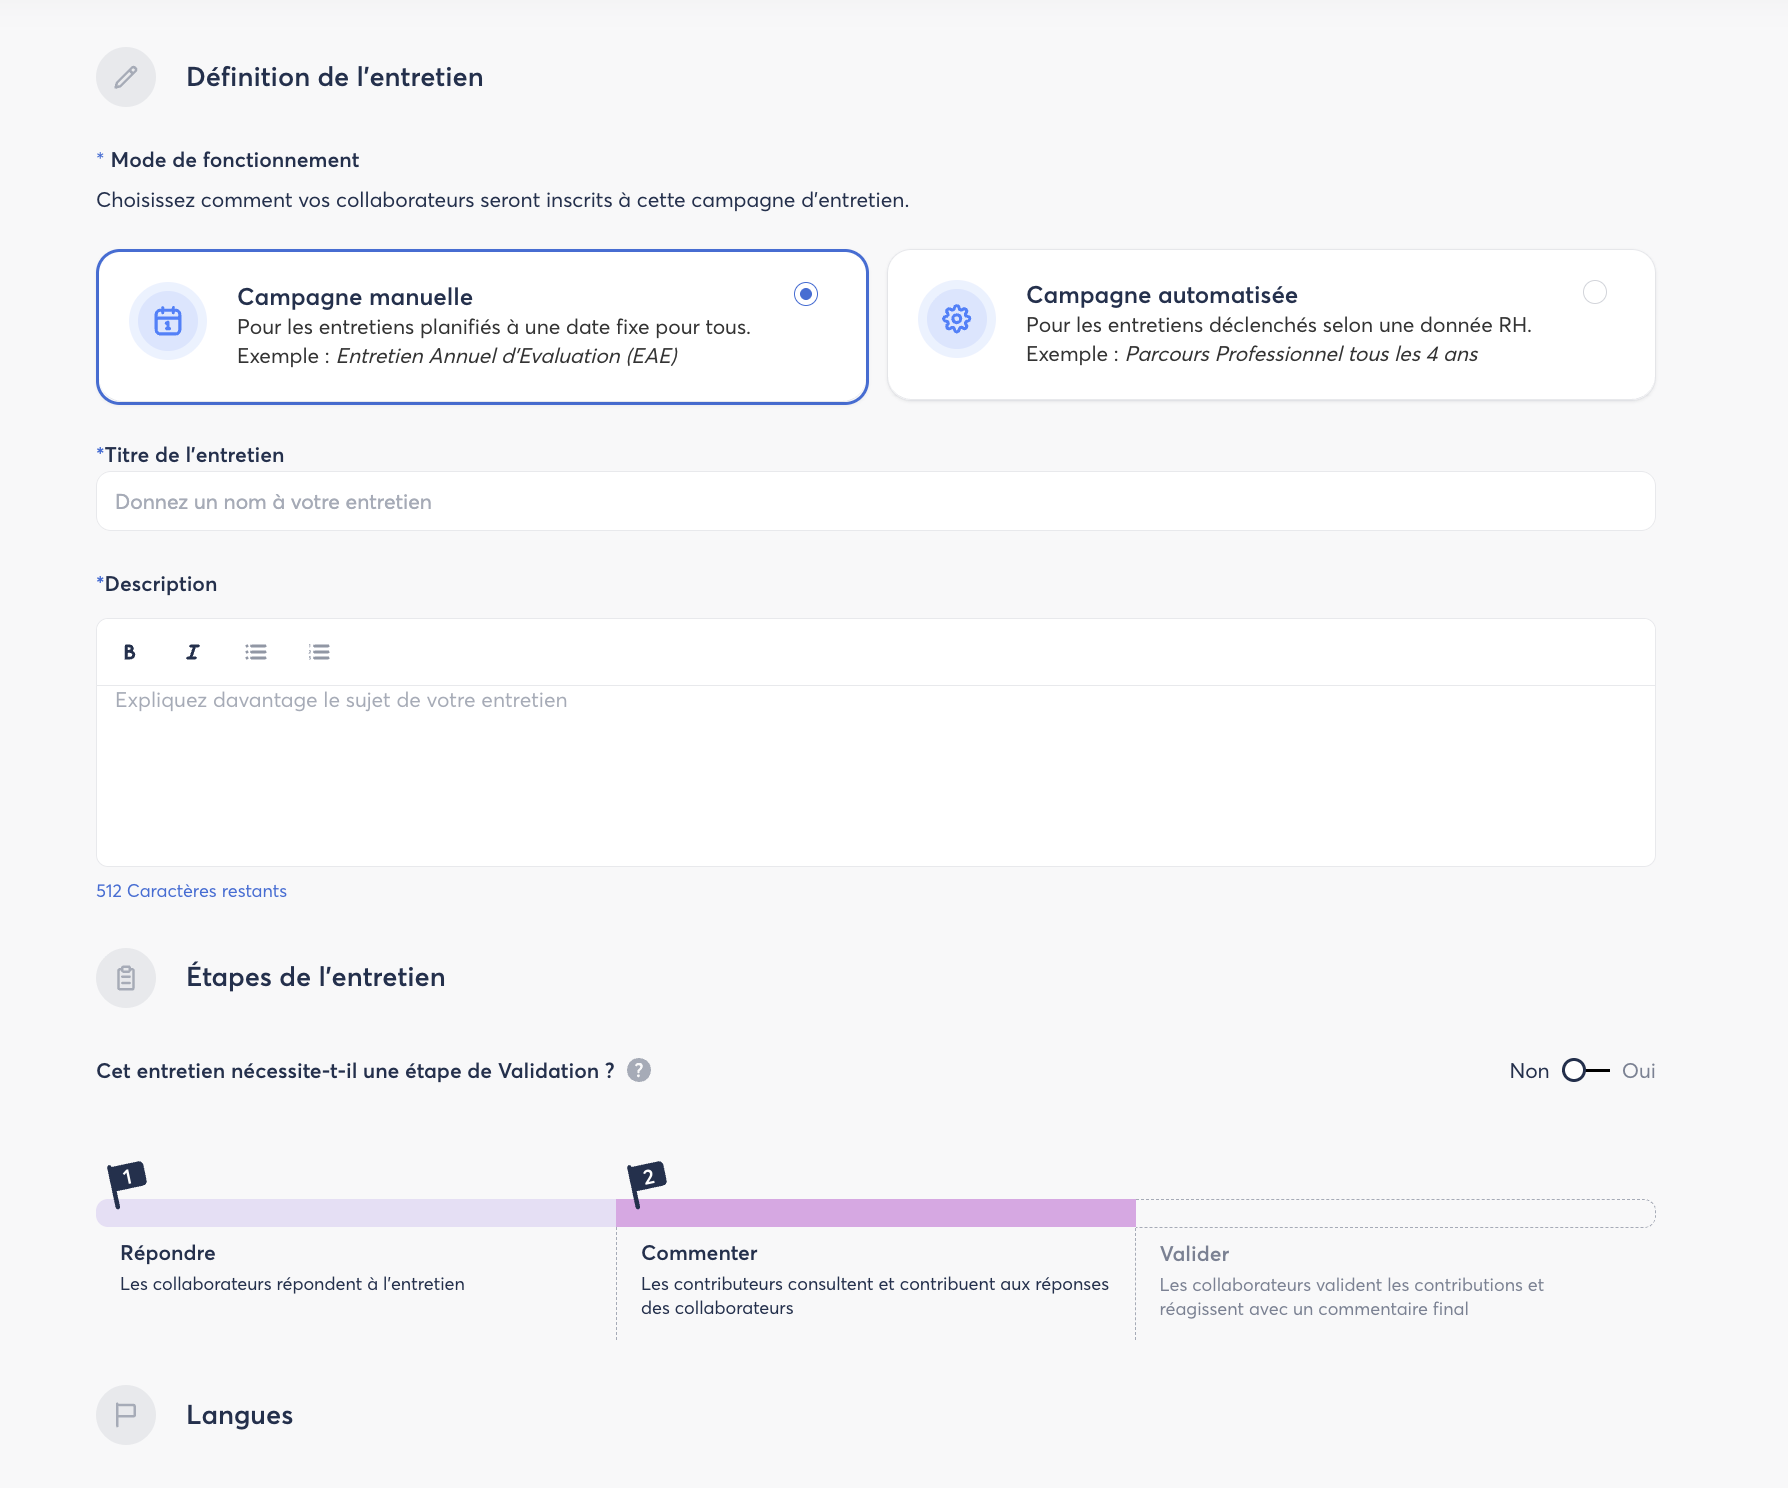
From the Evaluation page, click Create a campaign. You will enter the Define step, which consists of two sections: defining the review details, then selecting the participants.
Review details
- Enter the Review Title (required).
- Add a Description.
- Choose whether a Validation Step is enabled:
- Yes: the employee will need to validate the review at the end of the campaign. They will also be able to enter the date on which the review took place.
- No: the campaign will close at the end of the manager's contribution period.
- Select the Language(s) of the review.
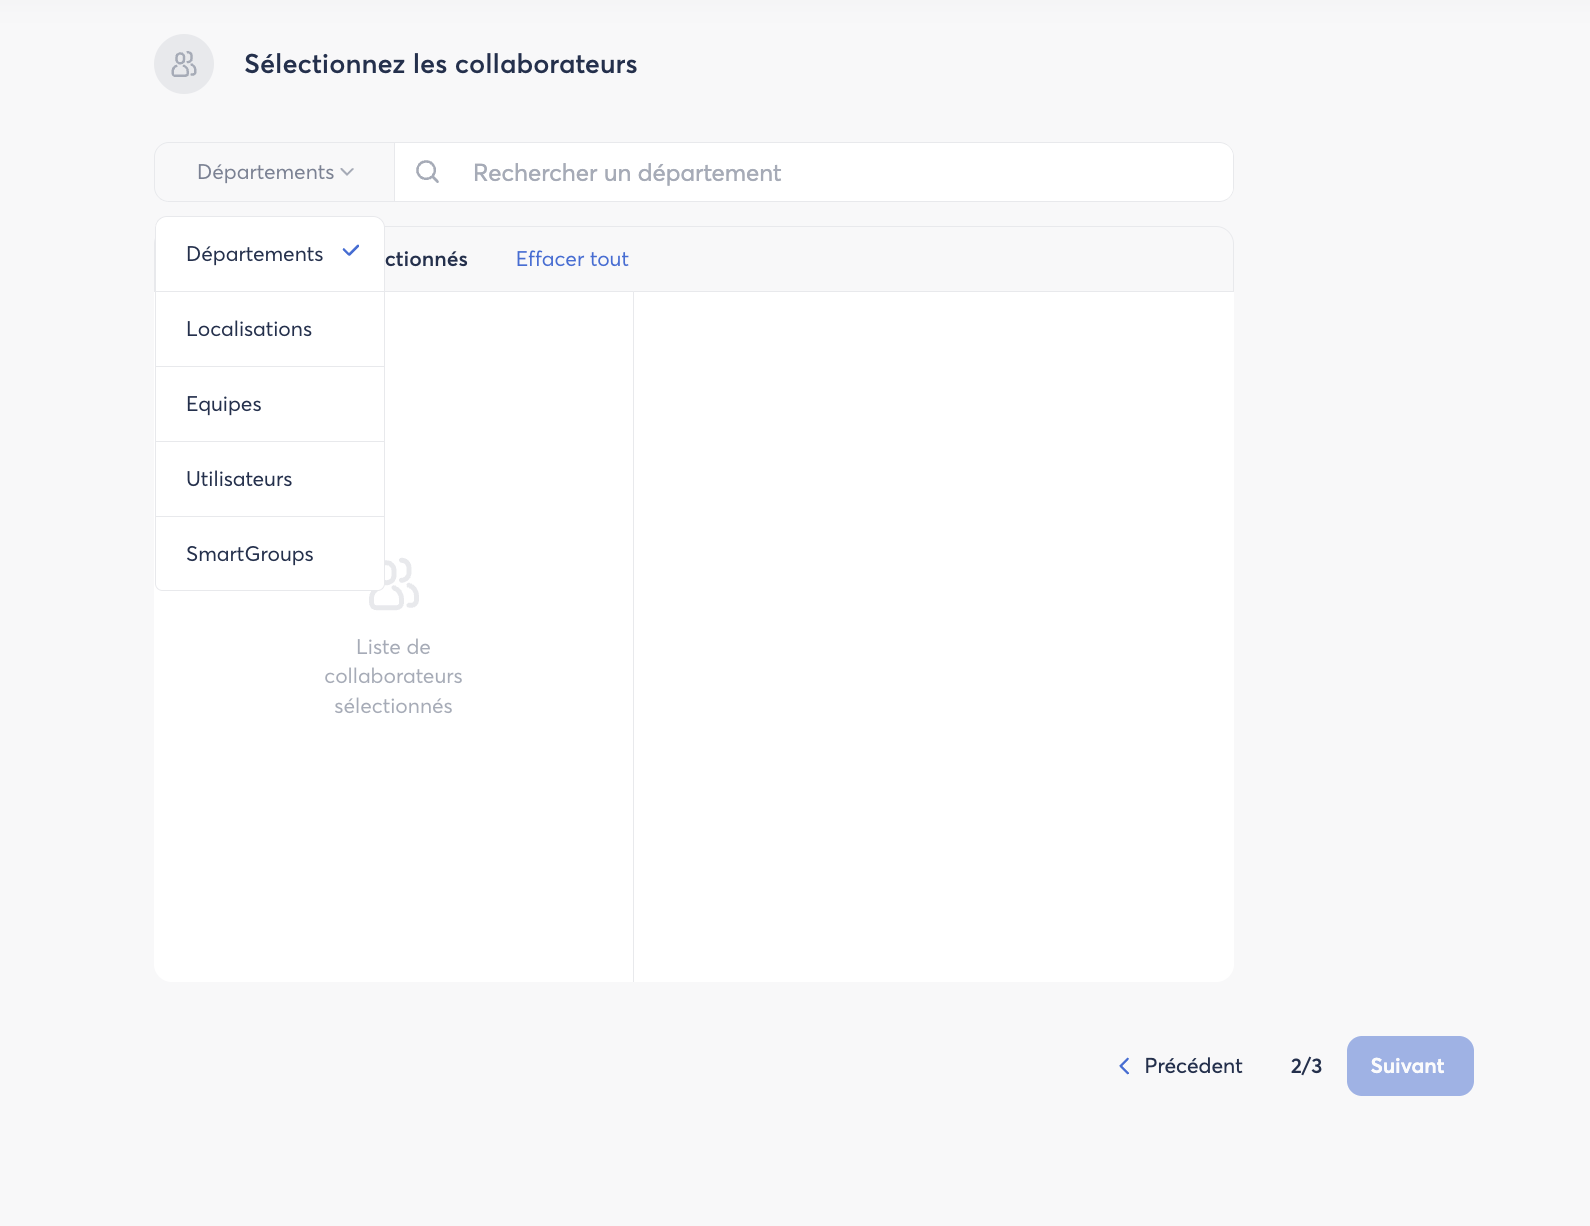
Select Employees
Define who will be evaluated as part of this review. You can select:
- SmartGroups: groups of employees that are automatically updated based on criteria defined in your SmartOrg (e.g., seniority, department, location). Two options are available: include all members or make a custom selection from the group members.
- Individual employees.
- Your entire organizational scope (SmartOrg).
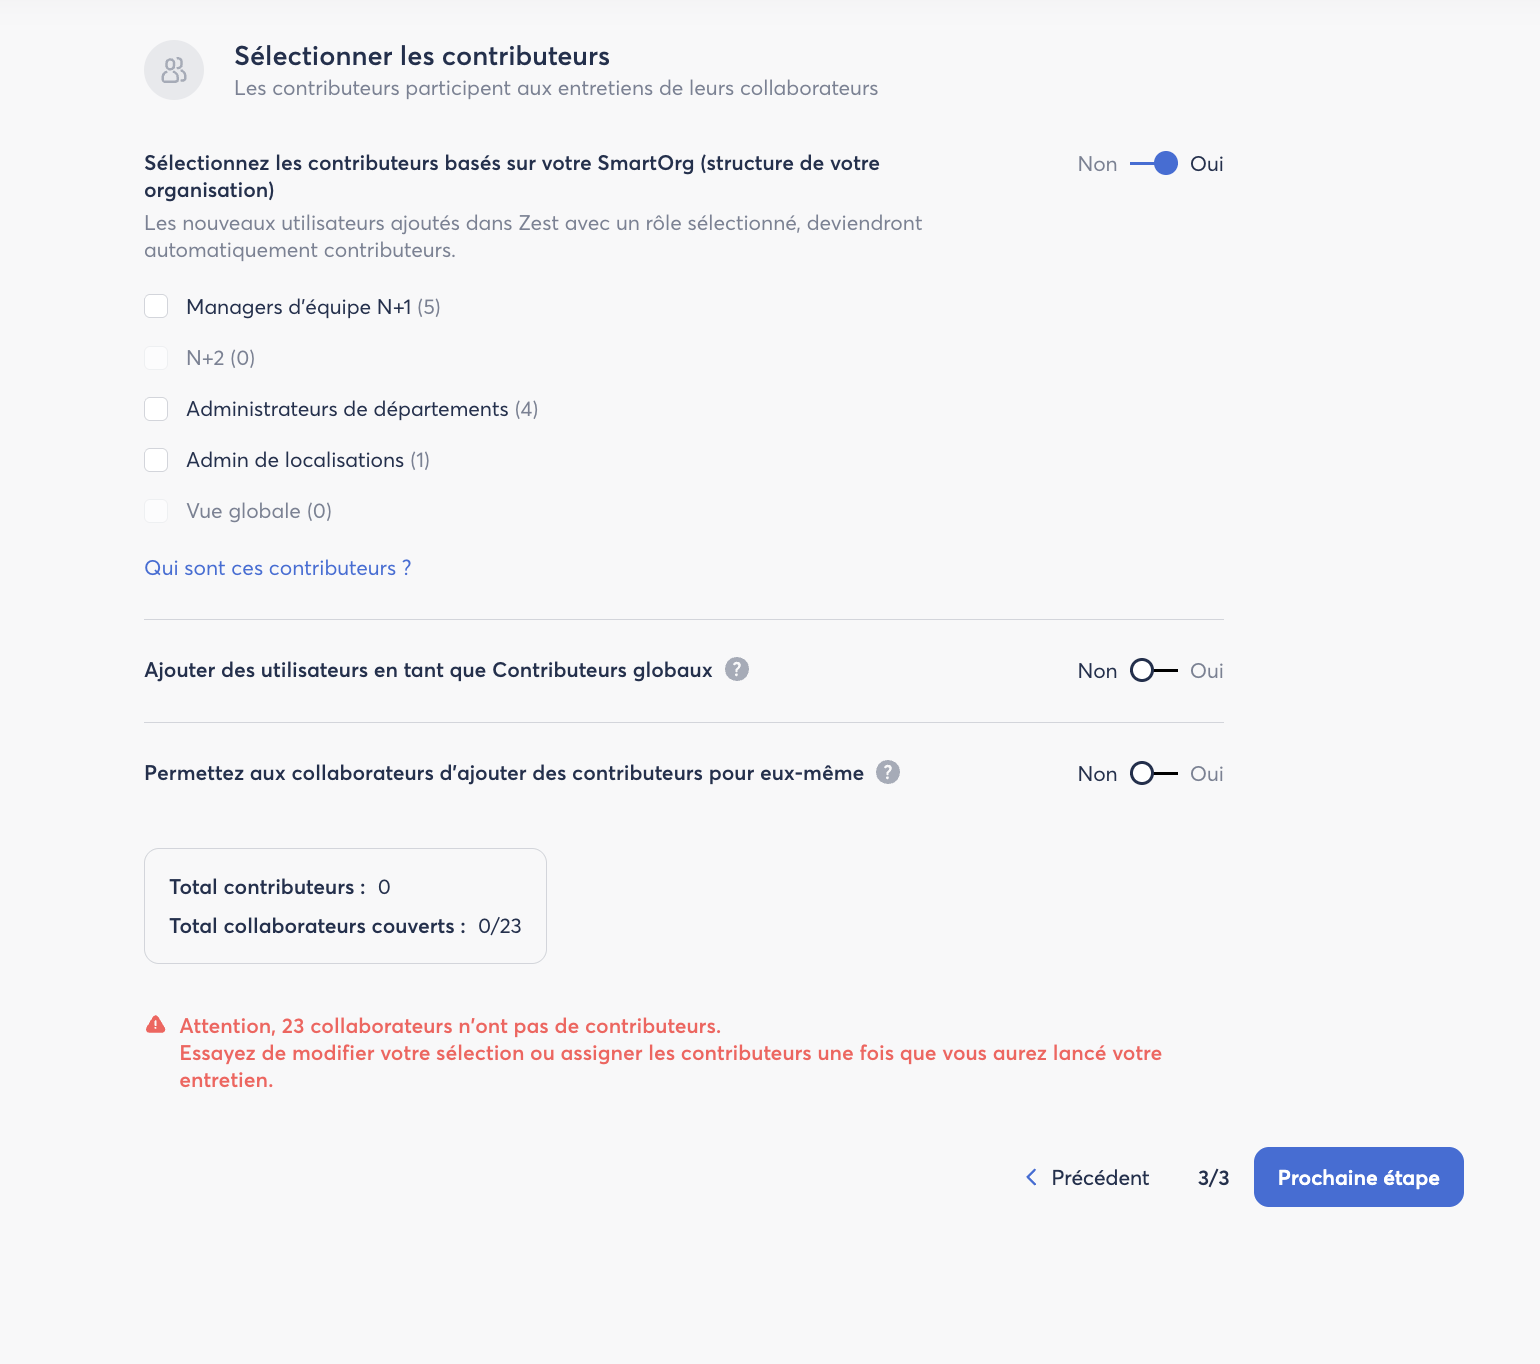
Choose Contributors
Define who will evaluate each employee. Several options are available:
- N+1 Manager (automatically defined based on the SmartOrg Team hierarchy)
- N+2 Manager
- Department Admin
- Location Admin
- Manual selection: you assign a specific contributor to each employee.
⚠️ Important – Manager change during the campaign: If a manager change occurs after the campaign has been launched, the review contributor is not updated automatically. You must therefore complete two actions:
(1) update the managerial relationship in the Back Office under Users > the employee’s Team tab, then
(2) from My Visibility Scope, click the three dots to the right of the relevant employee and select Assign a new contributor.
This action can be performed by an administrator or by the existing contributor(s).
⚙️ Create a Review – Step 2: Build the Template
The template is the core of your review. It is made up of Sections (chapters) containing Questions. You can use both simple and advanced questions.
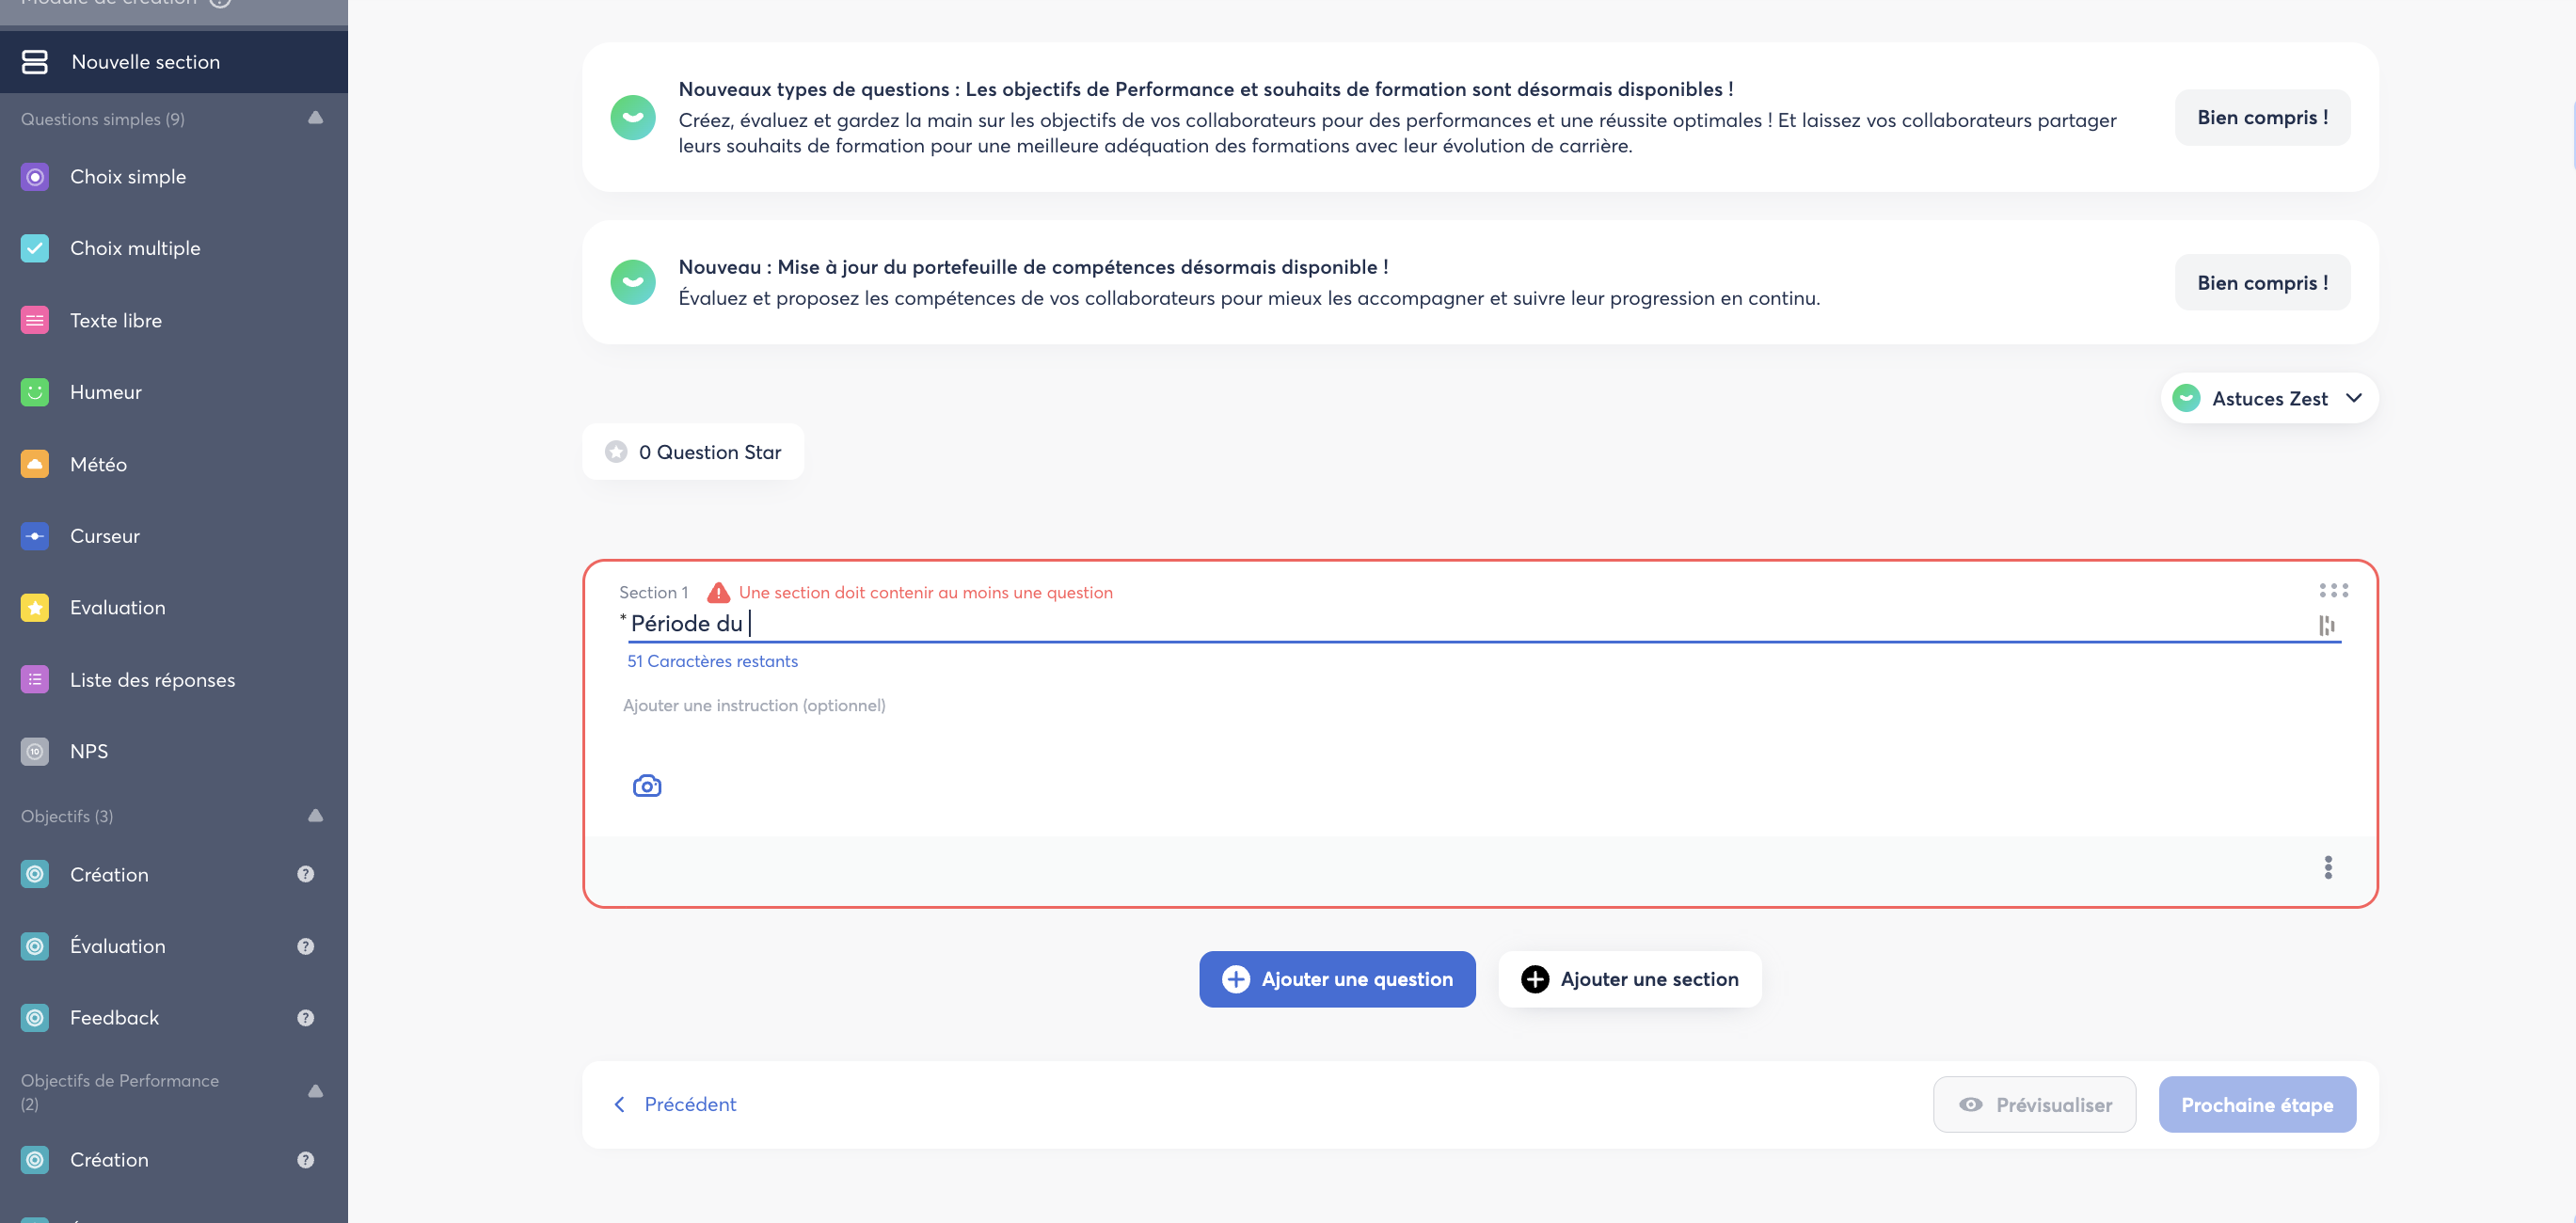
Sections
A Section groups several questions around the same topic. To add a section:
- Click Add a section.
- Enter the Section Title.
- If needed, add Instructions and an Illustration Image.
Simple Questions
Zest offers 9 types of simple questions:
| Question type | Description |
|---|---|
| Single choice | The respondent selects one option from a predefined list. |
| Multiple choice | The respondent can select multiple options. |
| Free text | An open-ended response written freely by the respondent. |
| Mood | Expressing mood using emojis. |
| Weather | Expressing one's state of mind using weather icons. |
| Slider | A sliding numerical scale (e.g., from 0 to 10). |
| Rating | Rating using stars (from 1 to 5 stars). |
| Answer list | A drop-down list of predefined answers. |
| NPS | Recommendation score from 0 to 10. |
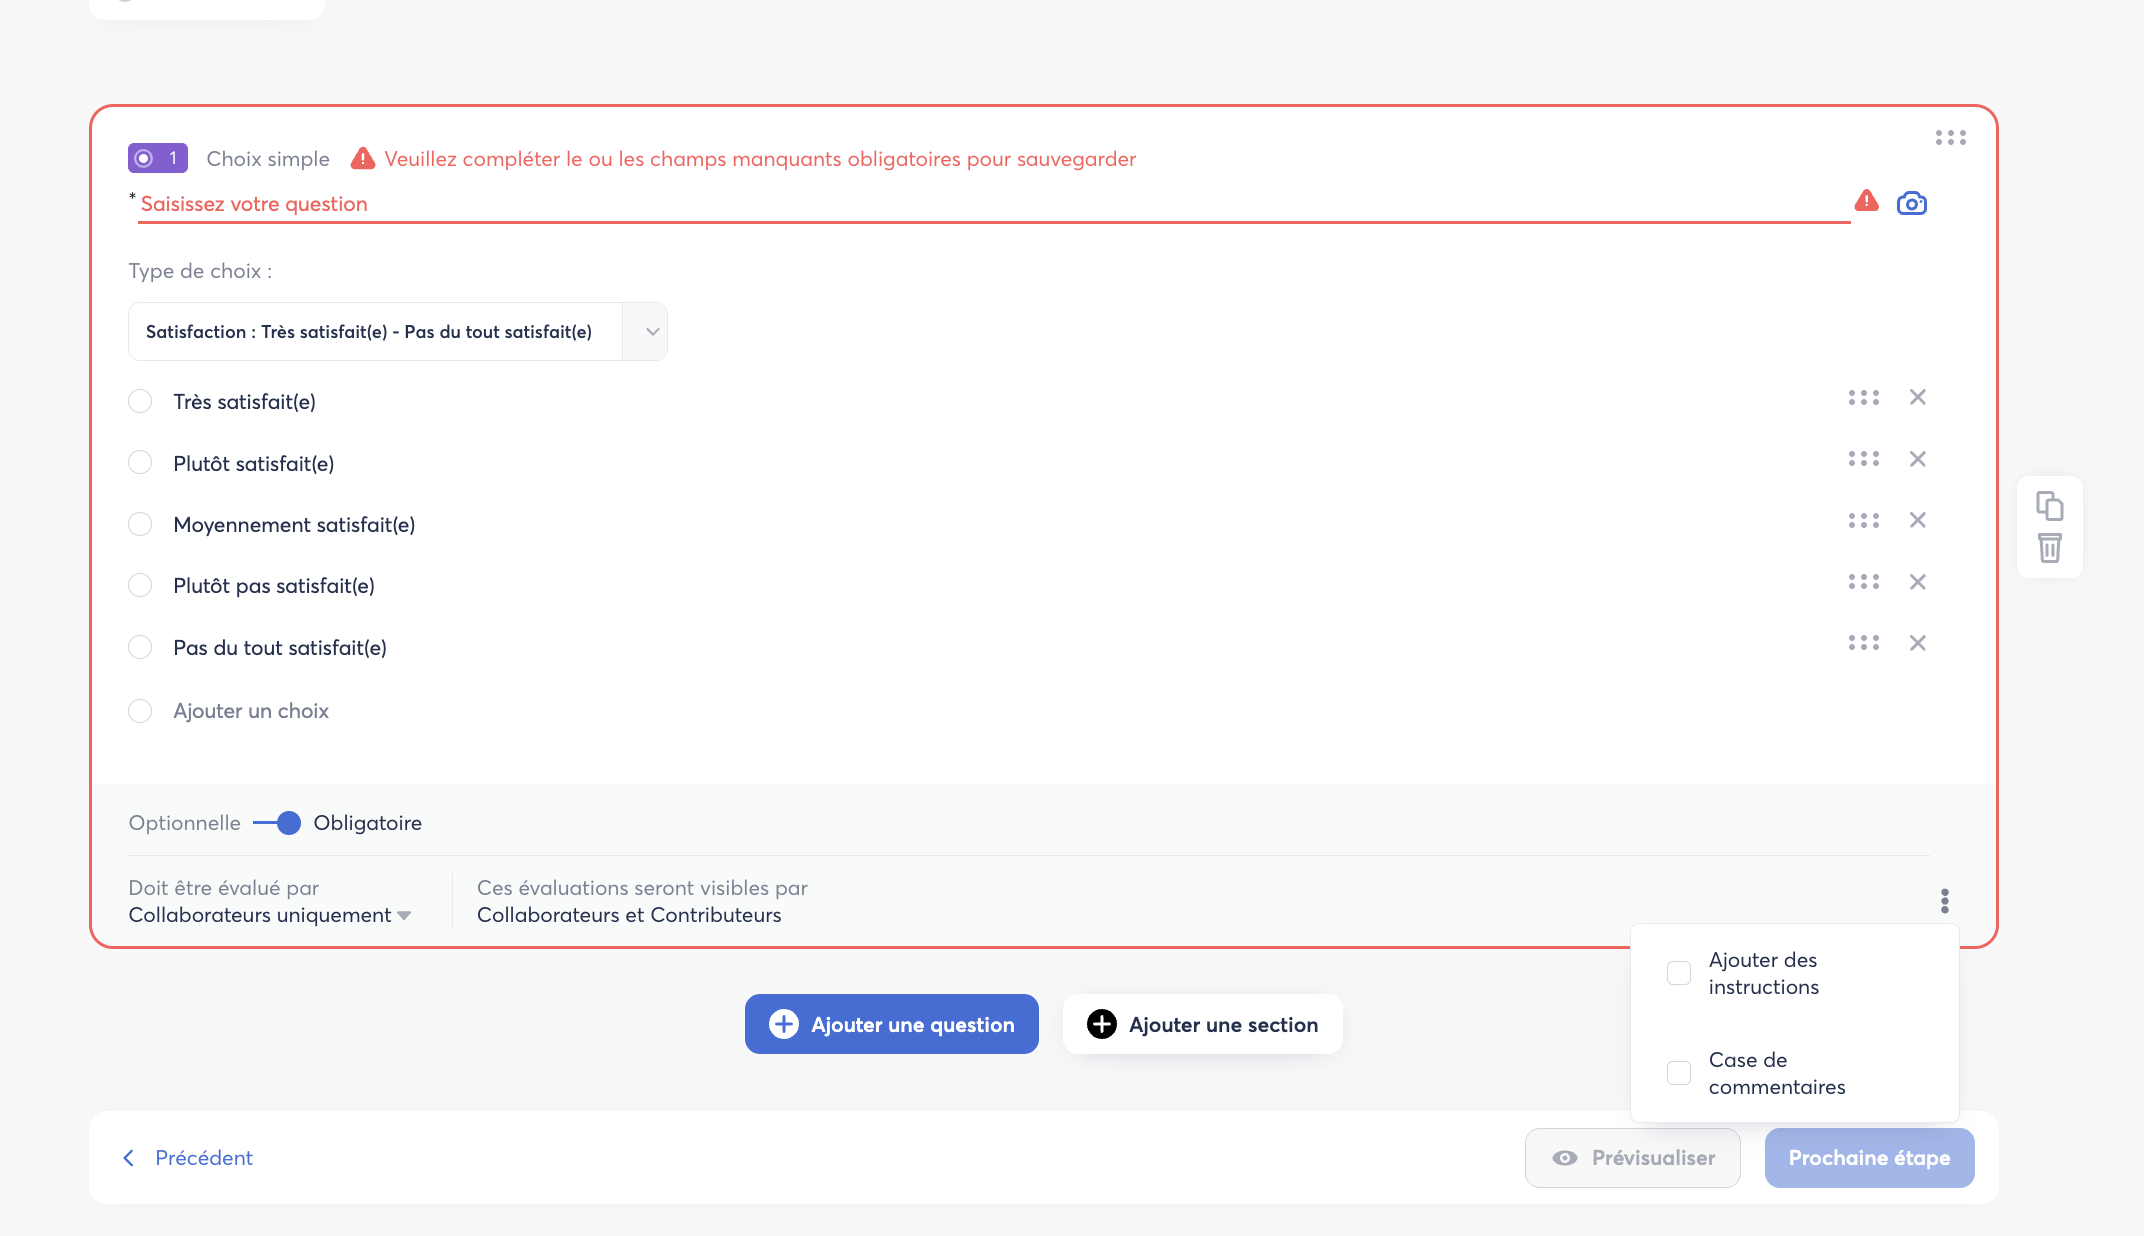
For each question, you can configure:
- The question label (required).
- Additional Instructions visible to the respondent.
- An Illustration Image.
- Whether the question is Required or Optional.
- Whether to enable a Comment associated with the answer.
- A Display Condition: the question is only displayed if a specific condition is met on a previous question.
- Who should answer the question: contributor, employee, or both.
Star Questions ⭐
A Star Question is a question that is visually highlighted in dashboards to make it easier to monitor and quickly review results.
To mark a question as a Star Question:
- Enable the Star Question option when configuring the question.
- Enter a short description (maximum 20 characters) to easily identify the question in reports.
💡 Tip: Use Star Questions for key indicators that you want to prioritize in your results (e.g., overall satisfaction, perceived performance level). Star Questions are only available for recurring reviews and are not available in One Shot mode.
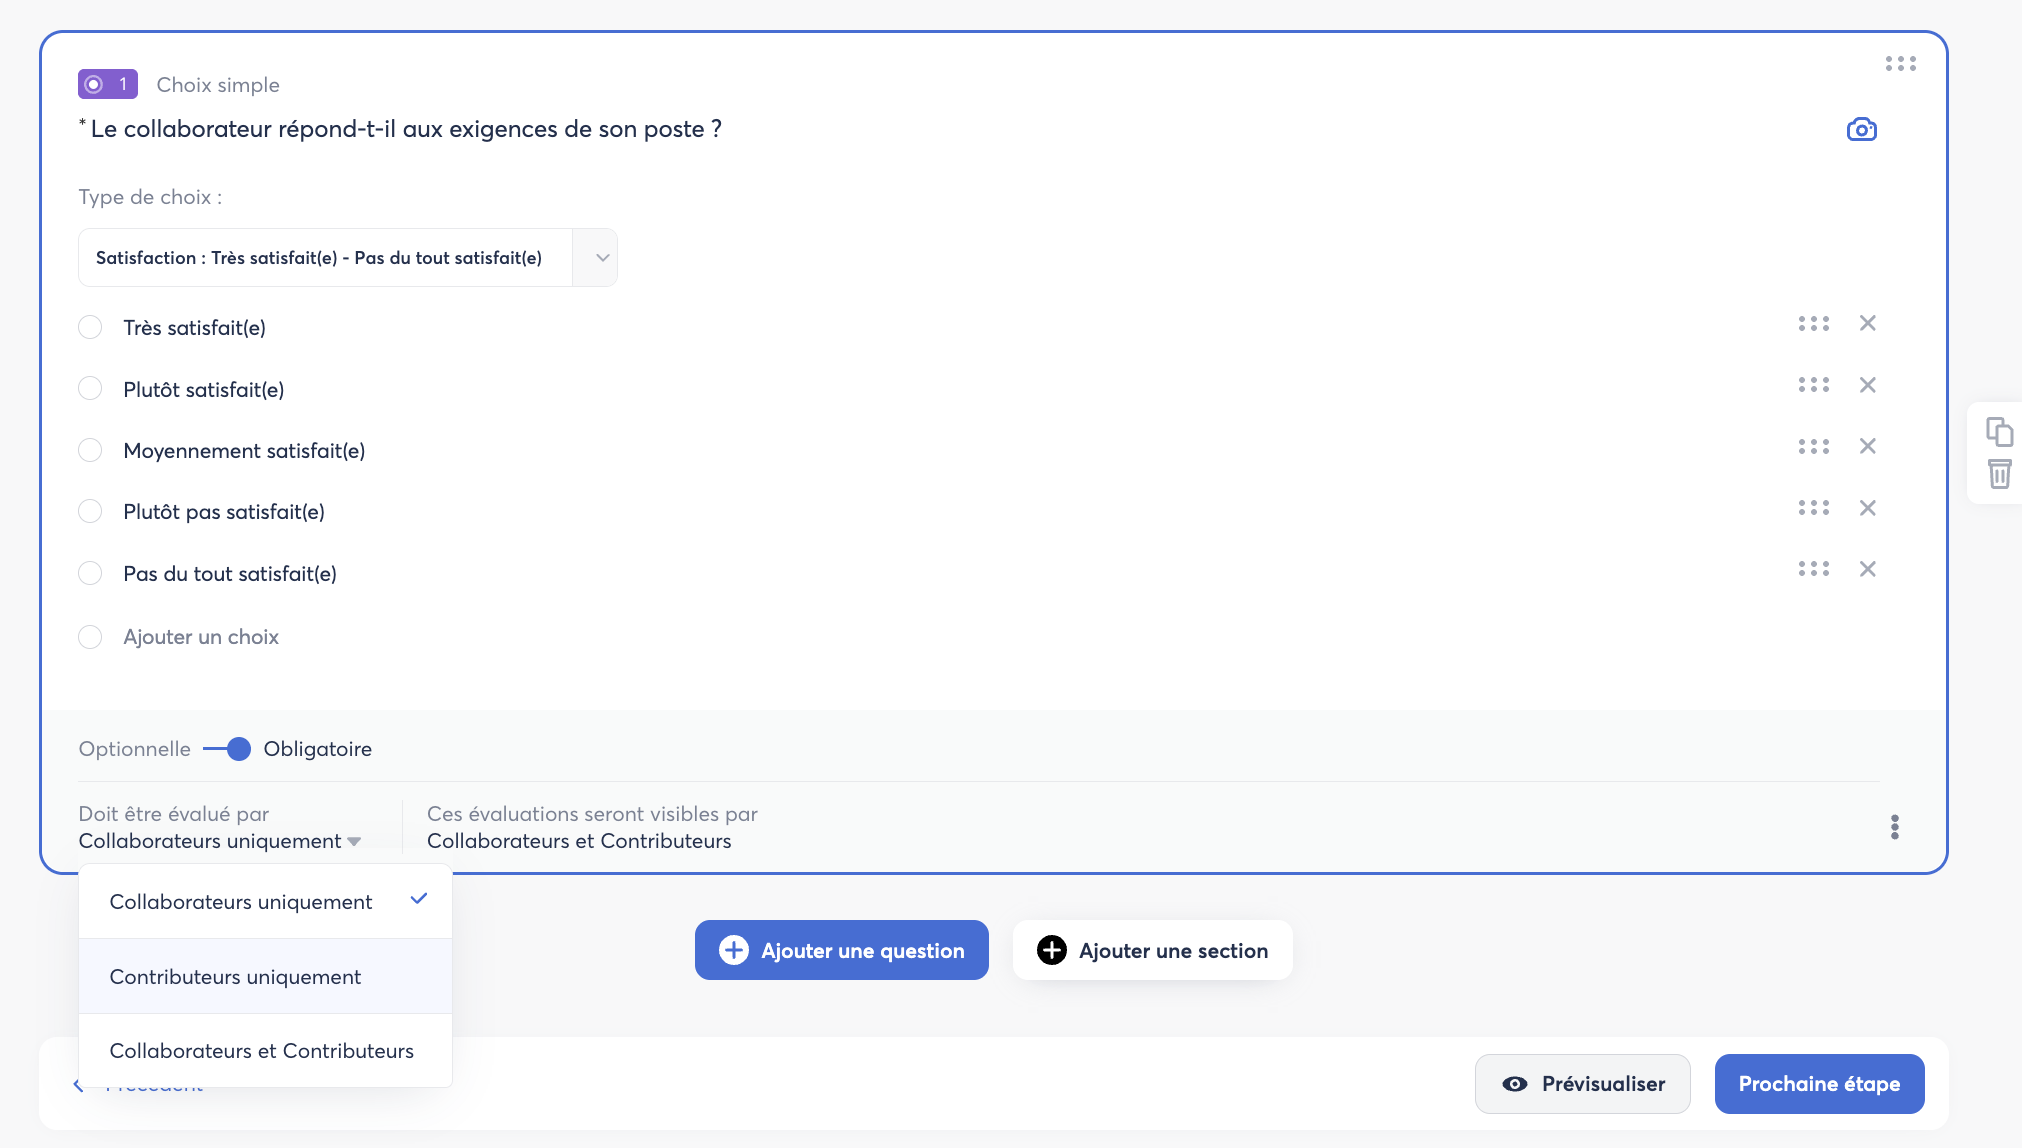
“Contributors only” Questions
Some questions can be restricted to contributors (managers/evaluators) and remain completely hidden from the employee. To enable this option:
- In the question settings, locate the Must be evaluated by field.
- Select Contributors only.
This option allows managers to provide internal assessments or comments without the employee being able to view them.
Advanced Questions
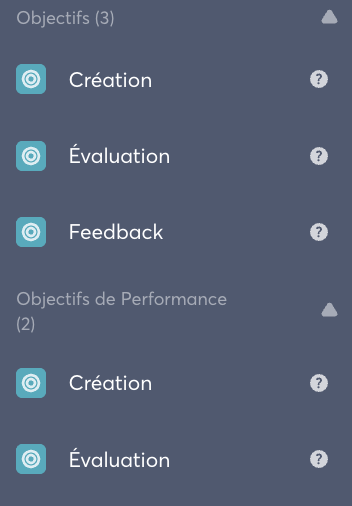
Advanced questions allow you to directly integrate Objectives, Competencies, Performance Objectives, Training Requests, and Training Evaluations into your review template.
Objective-related Questions
| Question type | What the employee does | What the contributor does |
|---|---|---|
| Create Standard Objectives | Proposes new N+1 objectives | Comments on the proposals |
| Evaluate Standard Objectives | Evaluates their objectives using a slider (0–100%) | Comments |
| Standard Objectives Feedback | Employees can provide feedback on their objectives | Comments |
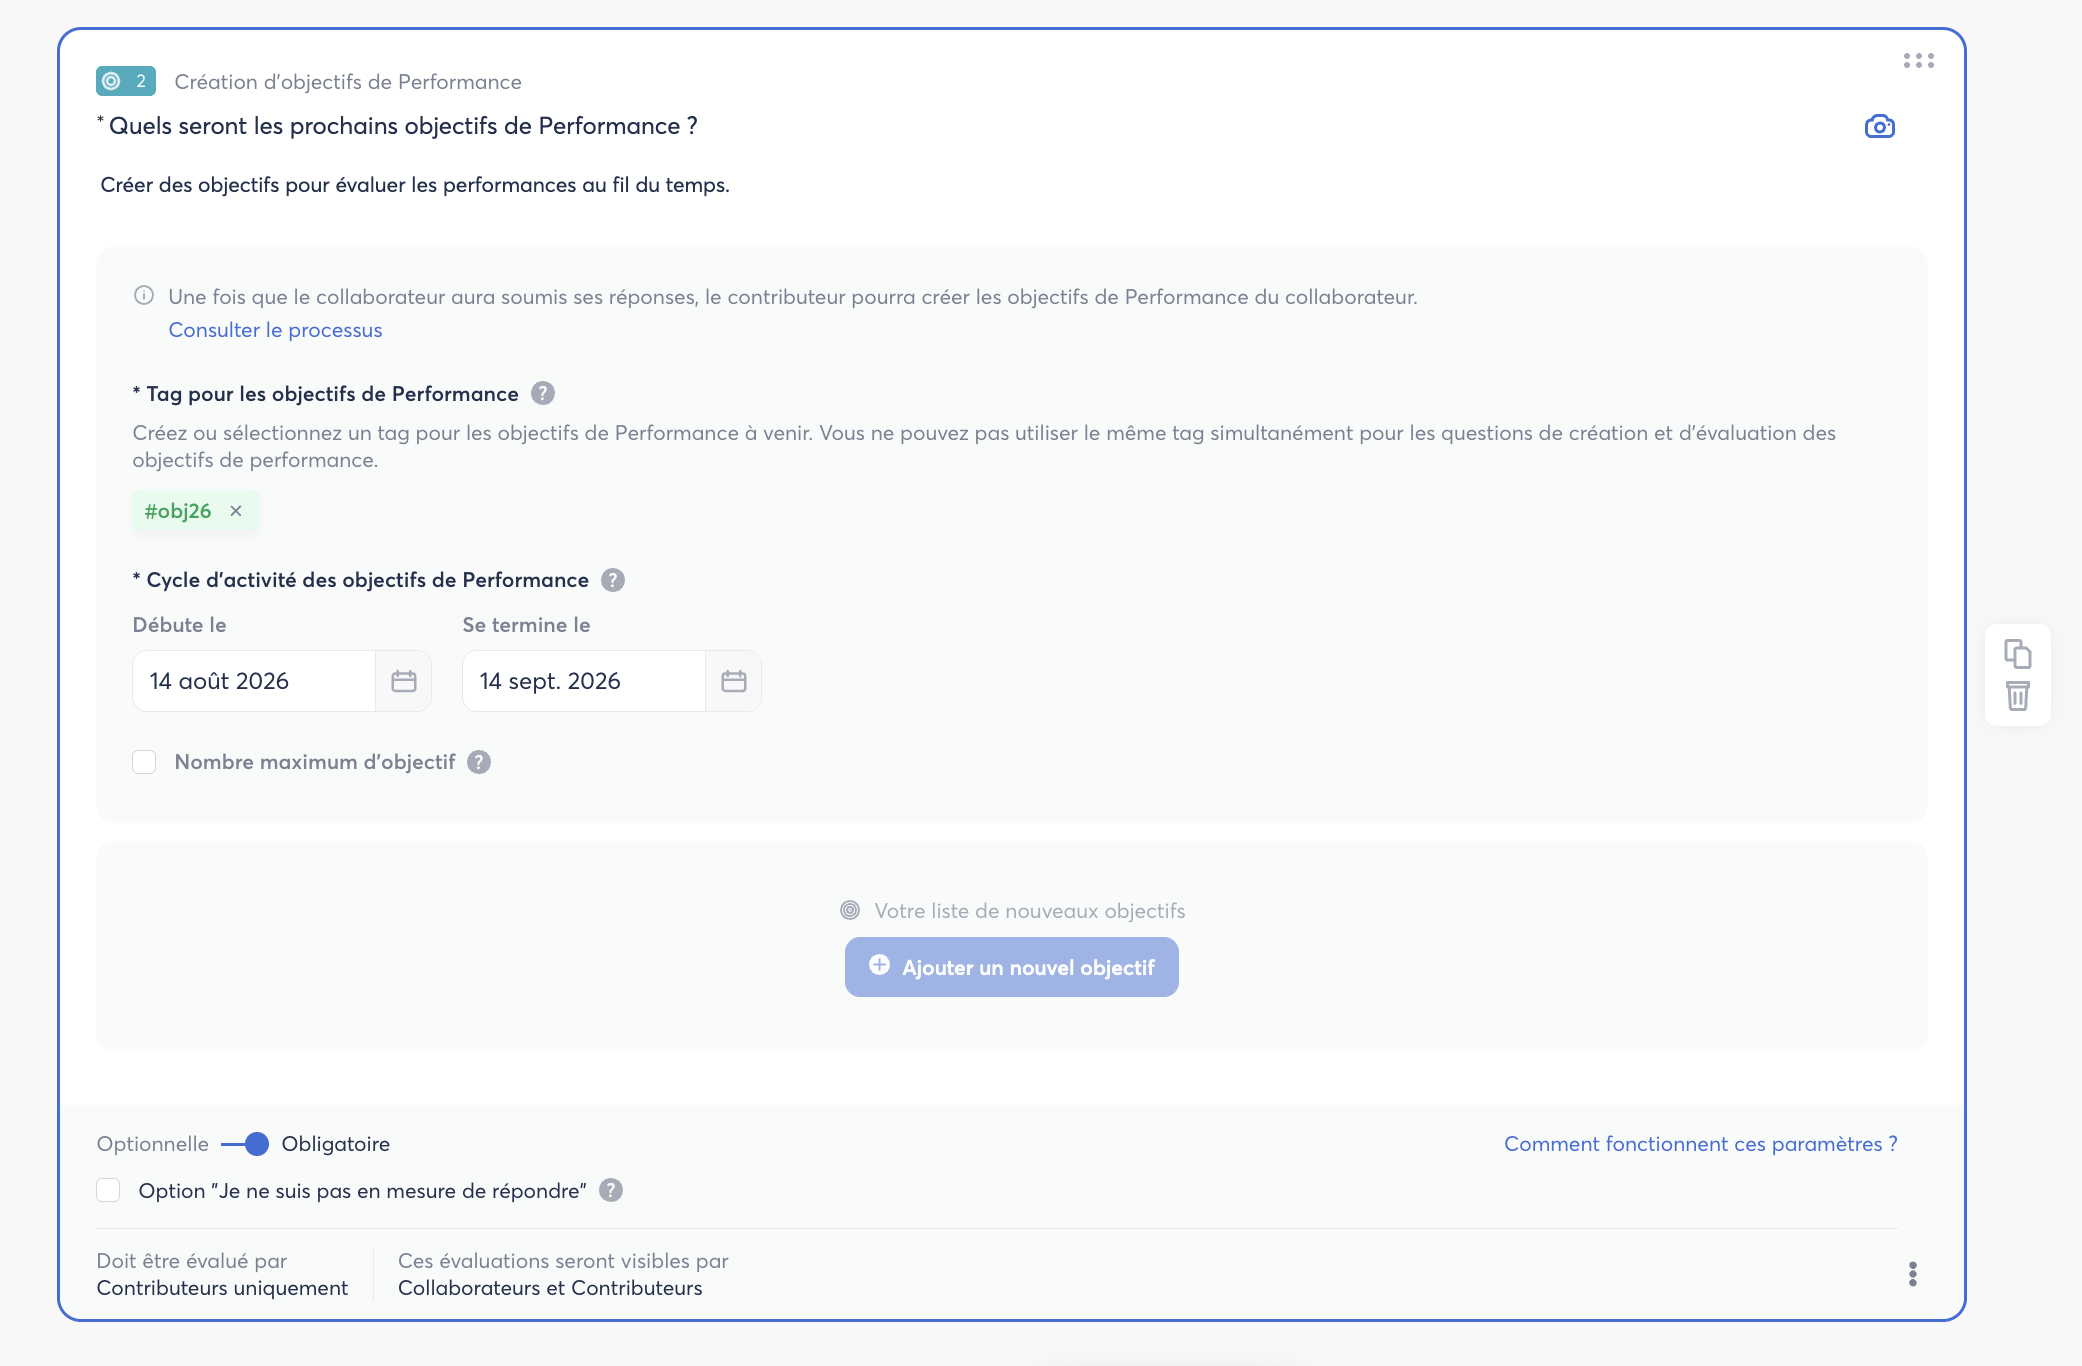
| Create Performance Objectives | Proposes new N+1 objectives | Creates them |
| Evaluate Performance Objectives | — | Evaluates the performance objectives |
Performance Objectives Question
Performance Objectives are a type of objective distinct from standard objectives. They can be identified by their green tag, whereas standard objectives use a blue tag.
This question allows the contributor (manager) to define:
- A weighting for each performance objective.
- An achievement rate for each objective.
When configuring this question in the template, you must enter a perfTag that exactly matches the tag used when importing the Performance Objectives.
⚠️ Important: Make sure the spelling of the tag is consistent. Each variation of the tag will create a separate tag.
Training Wishes Question
This question allows employees to express their training needs directly within the interview. Two formats are available:
- Free response list: the employee freely enters their training wishes.
- Predefined multiple choice: the employee selects from a list of training options pre-configured when building the question.
Consolidated training wishes can be exported to Excel from the Training tab on the Skills page.
📅 Creating an Interview – Step 3: Schedule
The Schedule step defines the timeline and duration of your interview.
Choosing the frequency
Two main options are available:
- One-time: the interview is launched once on a specific date. Ideal for annual performance reviews or one-off interviews.
- Recurring: the interview repeats automatically at a chosen frequency: Weekly, Monthly, Quarterly, Half-yearly, or Yearly. Each repetition constitutes an iteration.
Setting up the first iteration
- Enter the launch date and time for the first session.
- The time zone used is that of the campaign creator's computer.
- An annual preview is automatically displayed so you can verify the schedule of upcoming iterations before confirming.
Configuring the open periods
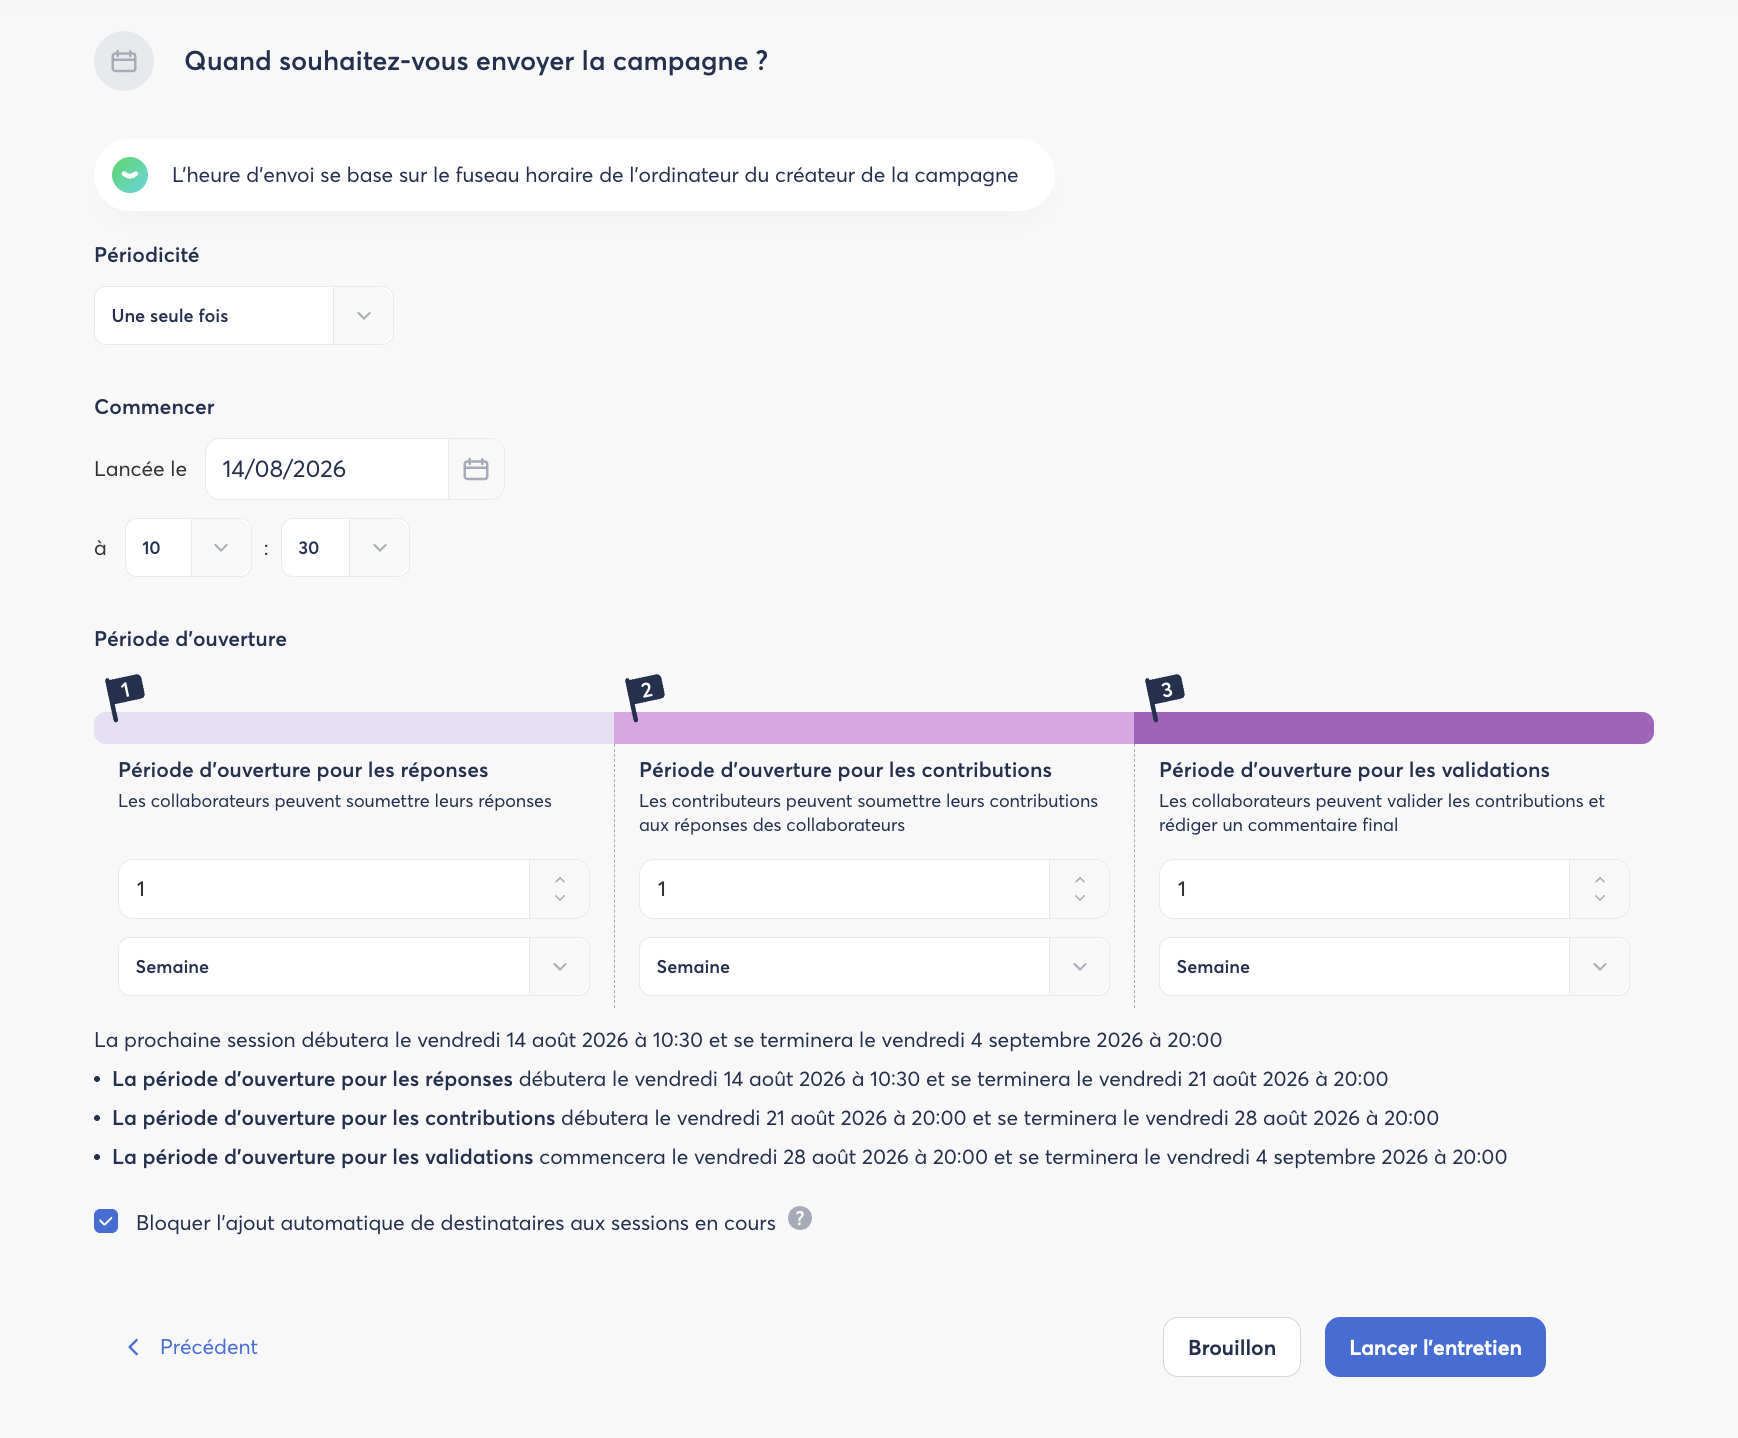
Each iteration (session) consists of three successive periods:
- Response period: employees can submit their answers.
- Contribution period: managers (contributors) can review the responses and submit their assessment.
- Validation period: employees validate the interview and can add a final comment.
Each period is defined in days, weeks, or months. The minimum duration is 1 day.
If a period is in progress, it can be extended. If a period has ended, it can be reopened, provided the next iteration has not yet started. The reopening deadline is calculated based on the start date of the next session.
Option: Block automatic addition of recipients
By checking the option Block automatic addition of recipients to ongoing sessions, new employees who join the recipient group after a session has launched will not be added to that ongoing session. They will automatically be included in the next session.
This option is particularly useful for onboarding interviews based on dynamic SmartGroups.
✅ Launch or save as draft
At the end of the configuration, two actions are available:
- Draft: the interview is saved without being launched. You can return to it at any time to make changes before launching it.
- Launch: the interview is launched according to the defined schedule and employees receive the corresponding notifications.
From the Contributions and My visibility scope listings, you can also Save as template an existing interview. A window will ask whether you want to keep the question configuration (answer labels, star questions, display options, etc.). The created template is then available in your library for future campaigns. Only the interview creator can perform this action.
🔄 Managing an ongoing interview
Editing an ongoing One-Shot interview
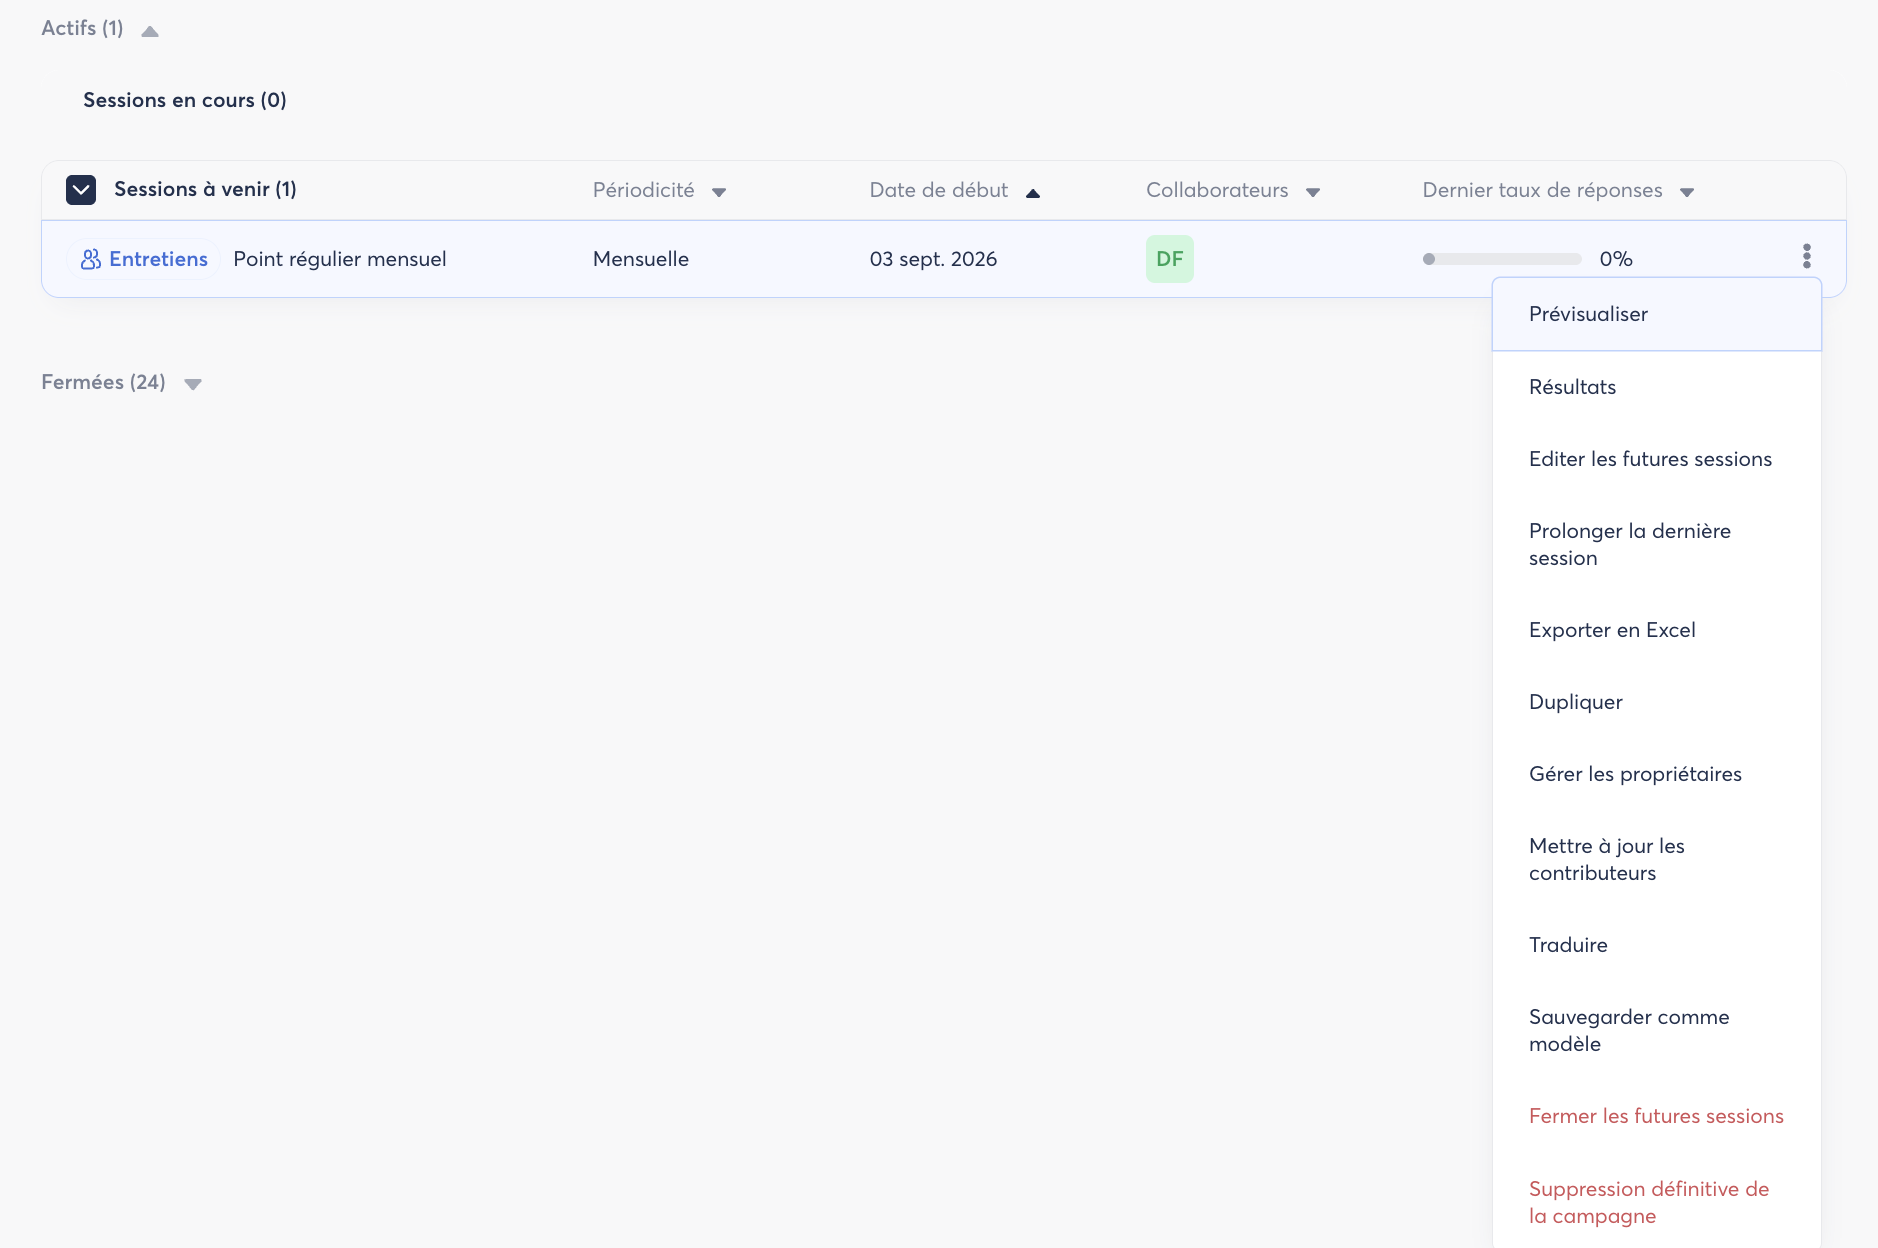
From My visibility scope, click the three dots to the right of an active interview to access the available actions:
- Edit the interview owner(s).
- Add an employee to the interview.
- Remove an employee (only if the employee has not yet responded or saved a draft — action reserved for the creator).
- Add or change a contributor for a specific employee.
- Close the ongoing session.
- Delete the interview (action reserved for the creator).
Editing an ongoing recurring interview
In addition to the actions available for One-Shot interviews, you can also:
- Edit upcoming iterations: modify the title, description, recipients, contributors and periods for future sessions. Changes only apply to upcoming sessions, not to the current one.
If an employee is removed from a recurring interview, they will automatically be reinstated in the next iteration if they still belong to the recipient group.
Extending or reopening an open period
- Extend an ongoing period: you must be the interview owner and the period must still be active.
- Reopen a closed period: the reopening deadline corresponds to the next session's start date minus one day per reopened period.
When a period is reopened, all employees and contributors who have not yet taken action are notified. Those who have already responded or contributed cannot submit new responses.
📊 Monitoring the interview
The My visibility scope tab
The My visibility scope tab centralises all the interviews you follow based on the scope defined by the SuperAdmin in the rights configuration. You will find:
- Ongoing sessions: currently active interviews with the response rate, closing date and list of employees.
- Upcoming sessions: the next planned iterations.
- Closed interviews: completed (archived) campaigns.
The SuperAdmin sees the entire scope. Managers and administrators only see the scope they have been granted.
Viewing results
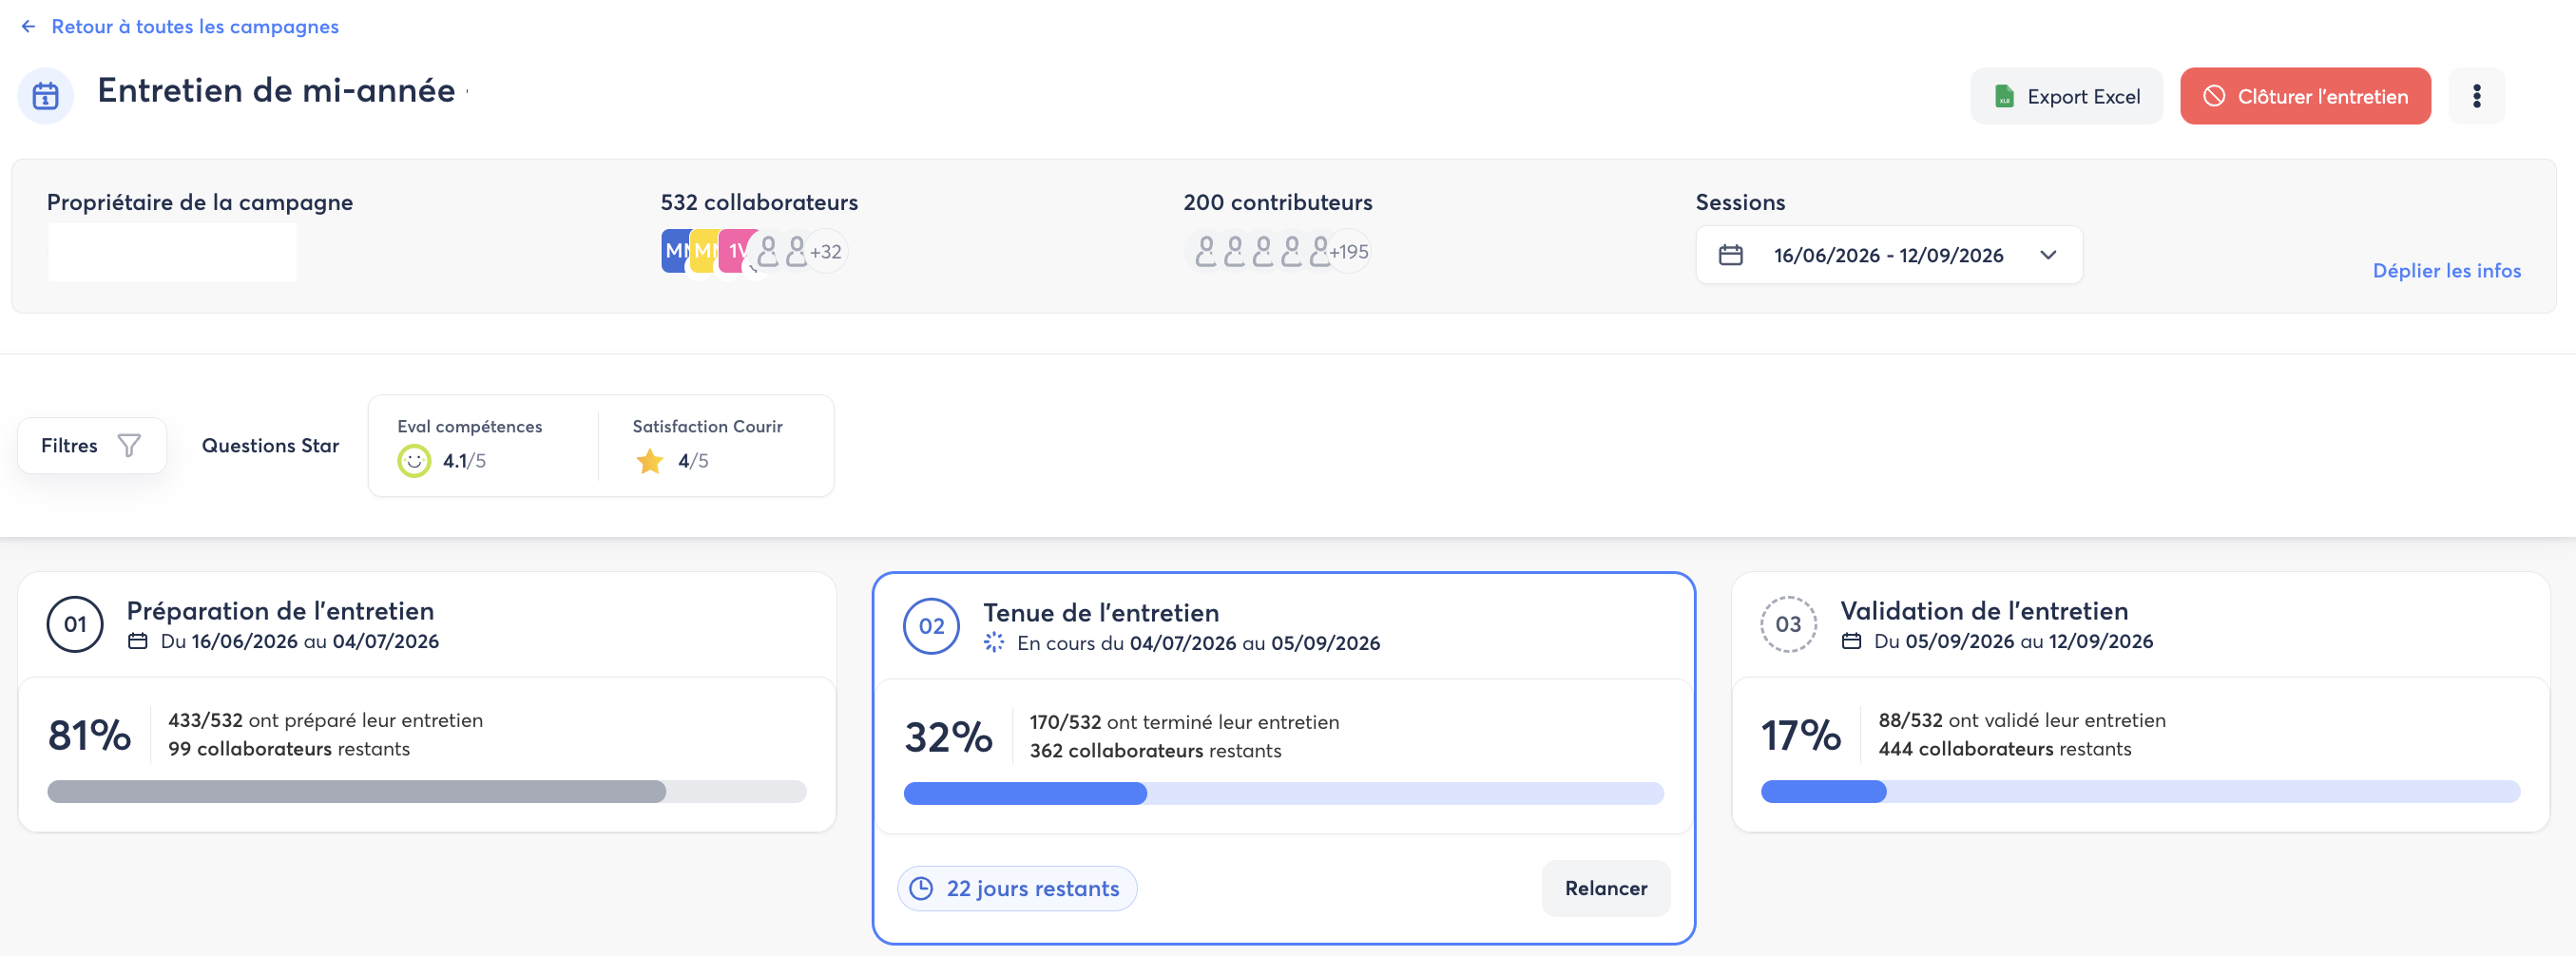
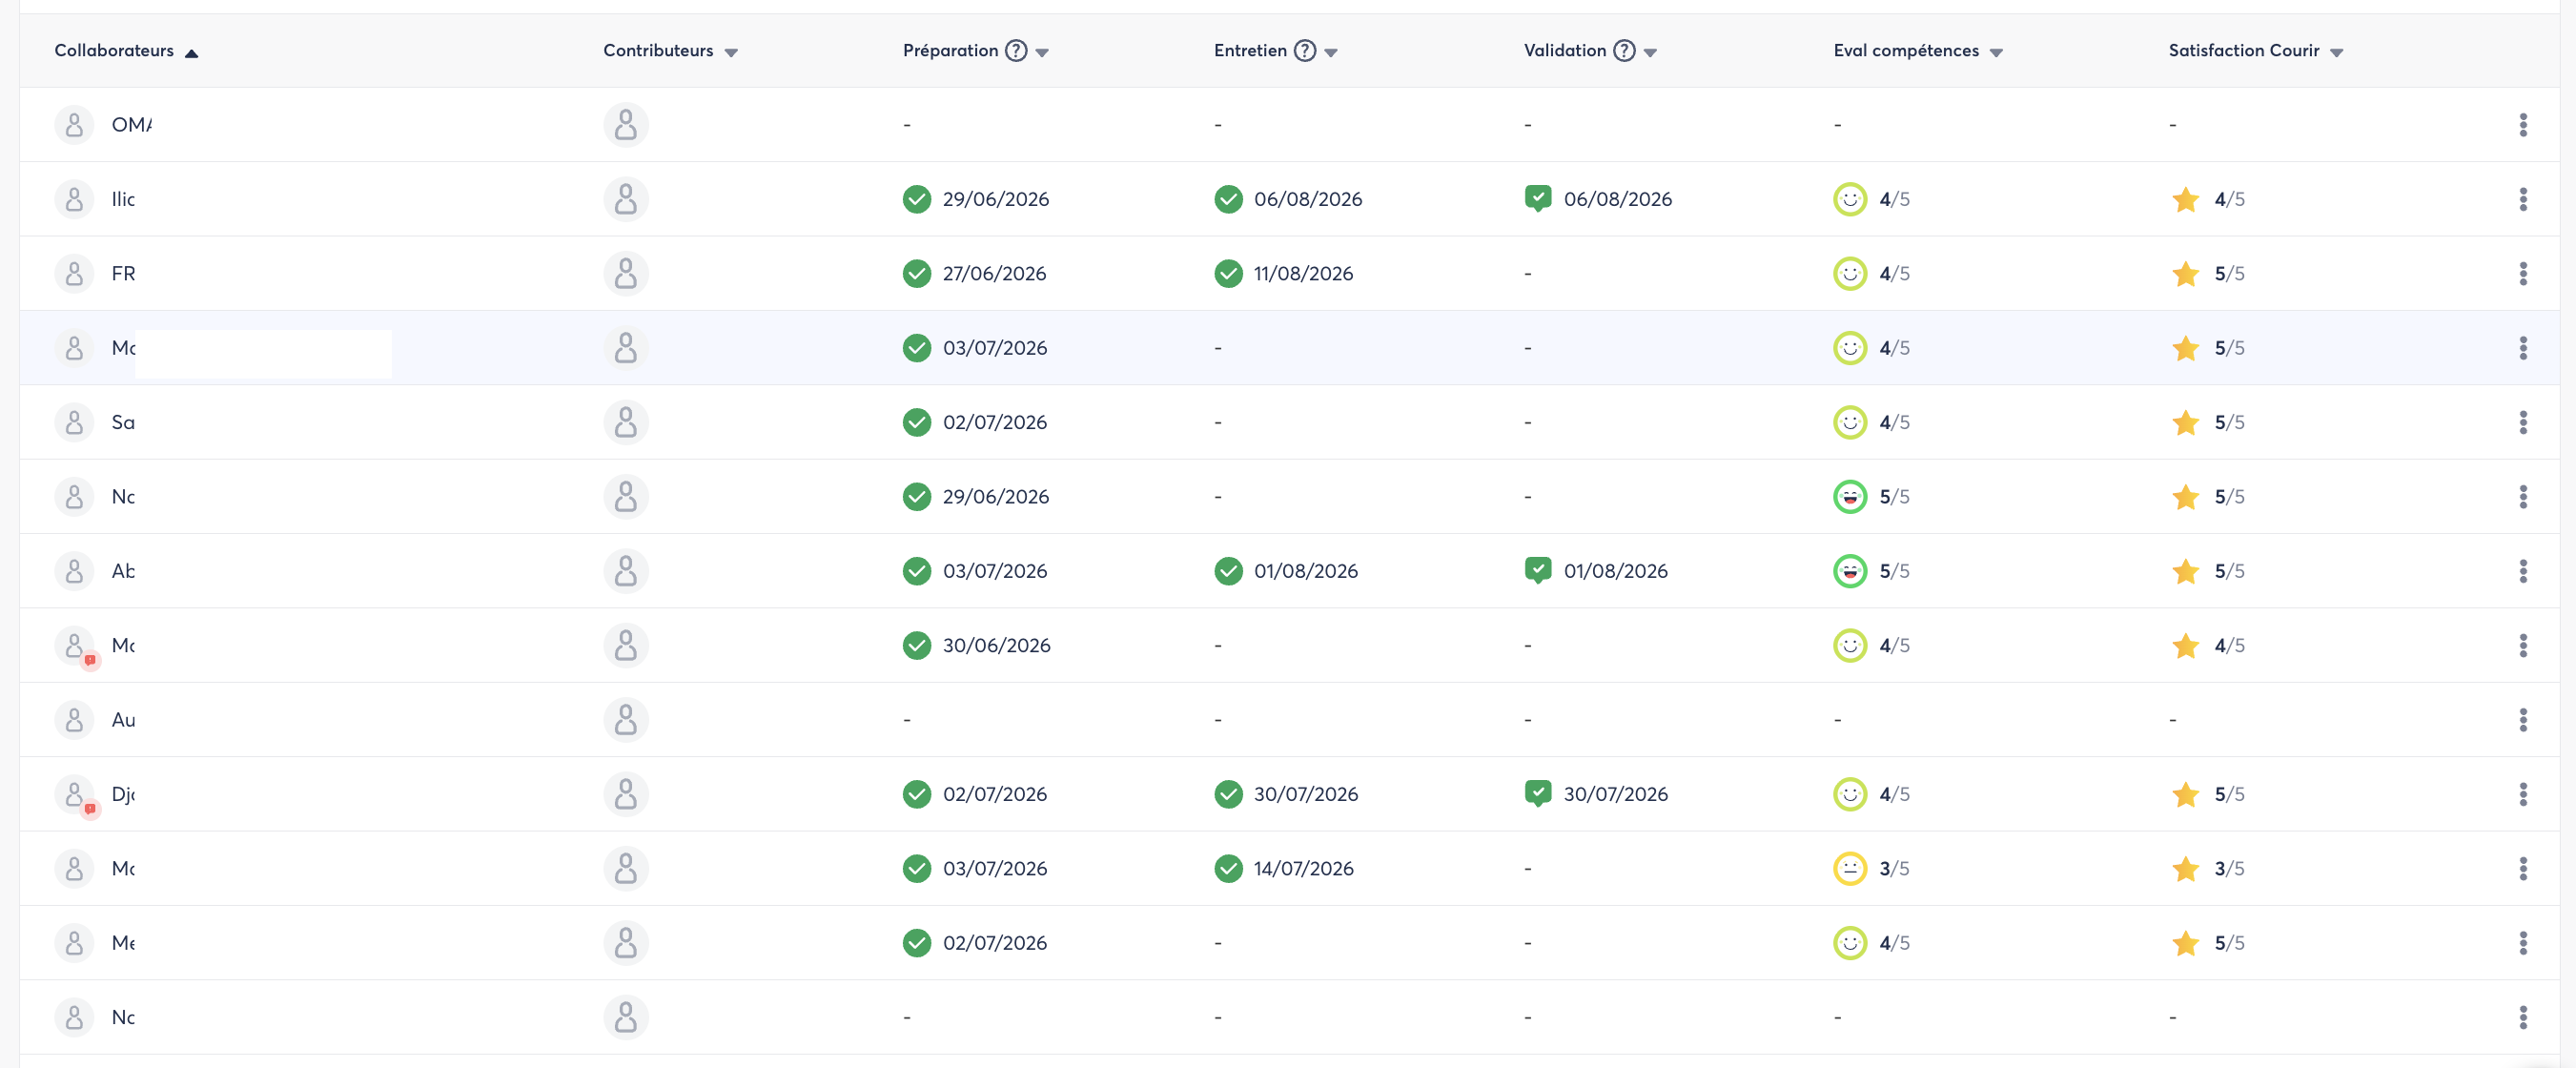
From My visibility scope, click on the ongoing campaign to access the dashboard:
- Response rate by team, period and session.
- Star Questions: scores displayed prominently.
- Named list of employees with their status (Responded, Commented, Validated, Not responded, etc.).
Exporting data
From the Results page, click Export to Excel to choose between two options:
- Participation tracking: who participated, when and how (response rate by team/department).
- Detailed responses: the responses from employees and contributors for each question. The generated Excel file contains 1 tab per question type.
🤝 The Employee experience
When an interview campaign is launched, the employee receives an email notification inviting them to respond.
- They access the interview from the Evaluation page or via the link in the notification.
- They go through the interview section by section and answer the questions.
- They can save their responses as a draft at any time to come back to them later.
- Once all their responses are complete, they submit the interview. The status changes to Responded.
- If the response period is still open and their contributor has not yet finalised their contribution, they can reopen their responses to make changes.
- After the manager's contribution, if the validation step is enabled, they receive a notification to validate the interview.
🤝 The Contributor (Manager) experience
When the employee has submitted their responses, the contributor receives a notification to contribute.
- They access the interview from the Evaluation page > My contributions.
- They review the employee's responses and can comment on each one.
- They assess objectives and skills through the advanced questions configured in the template.
- They draft their contribution before finalising it (the employee cannot see draft contributions).
- Once their contribution is finalised and the interview concluded, the status changes to Commented. The employee then receives a notification to review the contribution and validate the interview.
In an interview with multiple contributors, each contributor can see the employee's responses but does not necessarily see the other contributors' contributions. The employee can only validate their interview once all contributors have finalised their contribution, or at the end of the contribution period.