🤝 How to Contribute to a Review in Zest?
As a manager, you are the contributor for your employees' reviews. Your role is to review the answers they have submitted, add your comments and ratings, and then submit your contribution. This article guides you step by step through the process.
🔐 Prerequisites – Access Rights
To contribute to a review, you must have been designated as a contributor by the campaign creator (HR or SuperAdmin).
👉 If you do not see a review awaiting your contribution, please contact your HR team or a Zest SuperAdmin.
📧 Receiving the Contribution Invitation Notification
Zest automatically sends you a contribution invitation notification every day at 8:00 a.m. as soon as an employee on your team has completed their review the previous day.
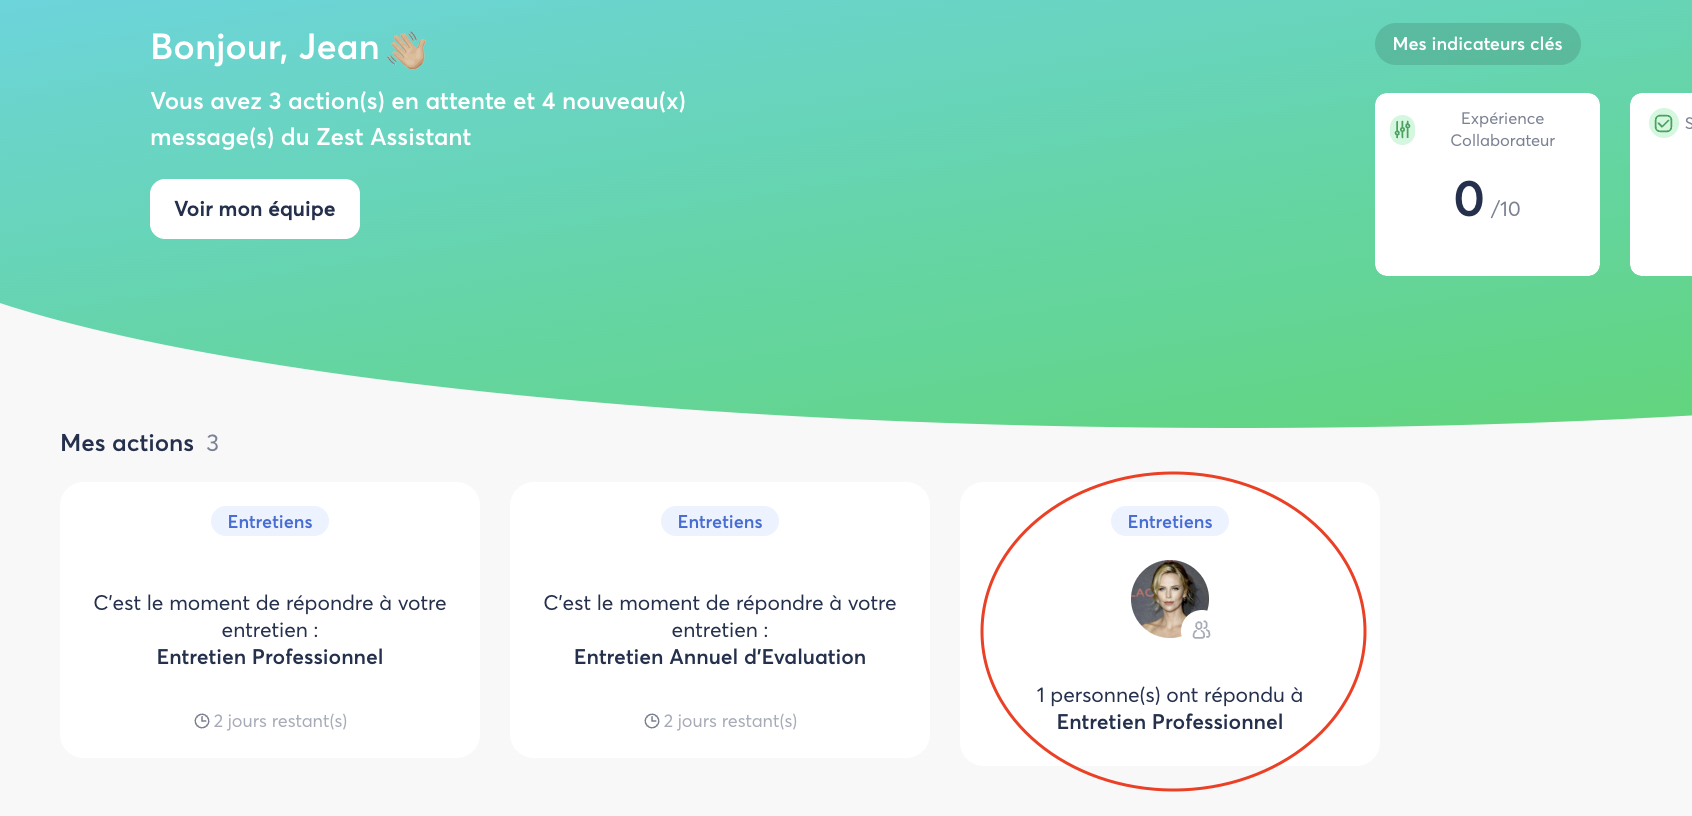
This invitation also appears directly in the My actions widget on your Zest homepage. It shows you how many employees have completed their review and are waiting for your contribution.
🚀 Contributing to the Review
Step 1 – Access the Contribution
- From the homepage, click the card in My actions, or go to Reviews > Contributions.
- Click on the relevant review to open it.
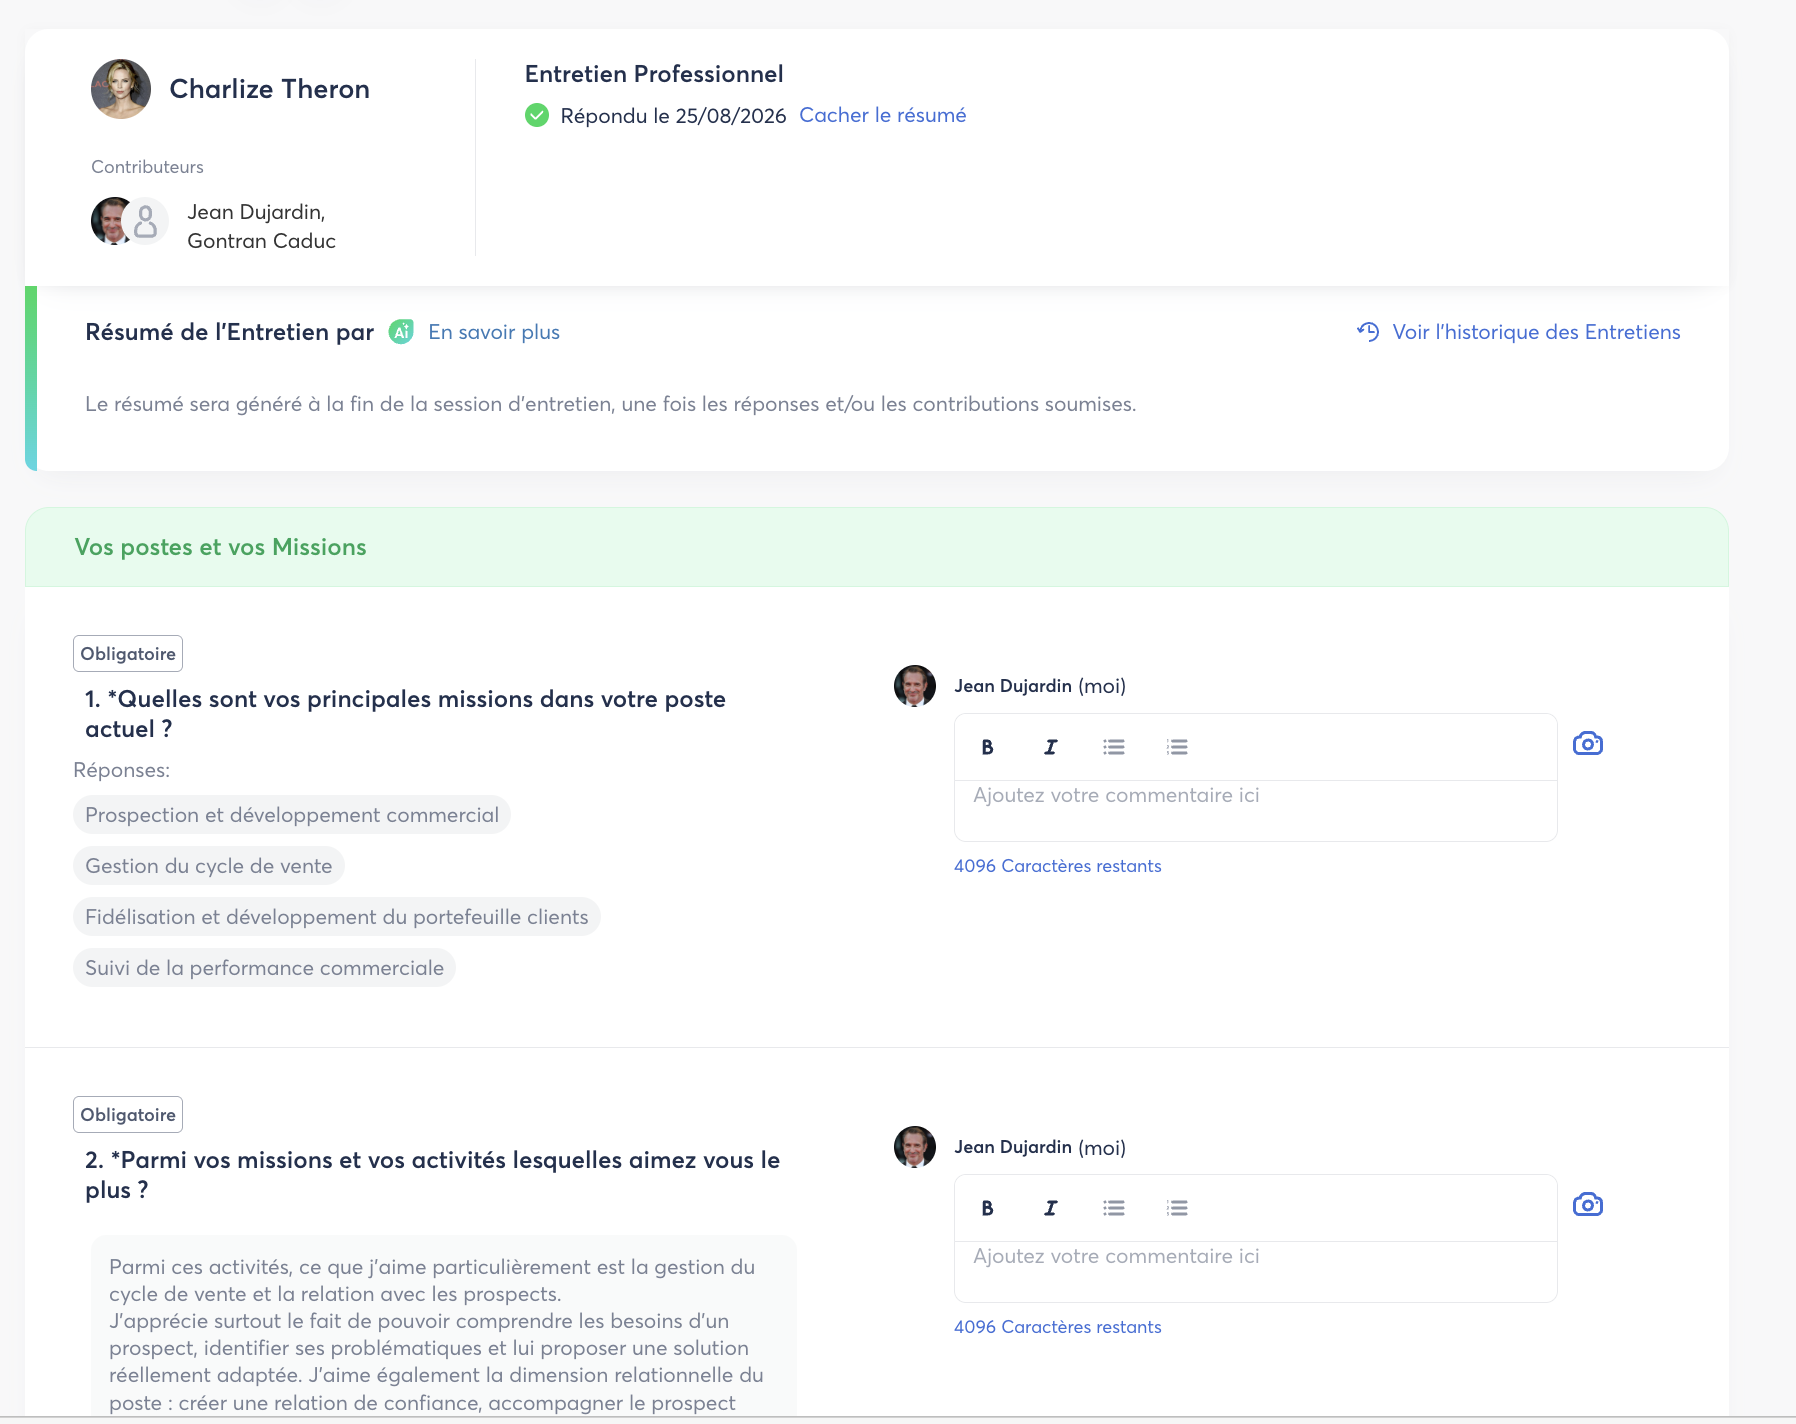
The contribution interface is divided into two columns:
- Left: the employee's answers.
- Right: your contribution area, where you can enter your comments for each question.
Step 2 – Write Your Comments
For each question, you can review the employee's answer and add your own comment in the dedicated field.
The text editor allows you to format your contributions using bold, italics, and bullet points. Each field displays the number of characters remaining (maximum 4,096 characters per answer).
💡 Tip: Take the time to review the employee's answers before writing your comments, particularly for questions related to responsibilities and objectives. This will help you provide a contextualized and constructive contribution.
⚙️ Creating Performance Goals (if configured)
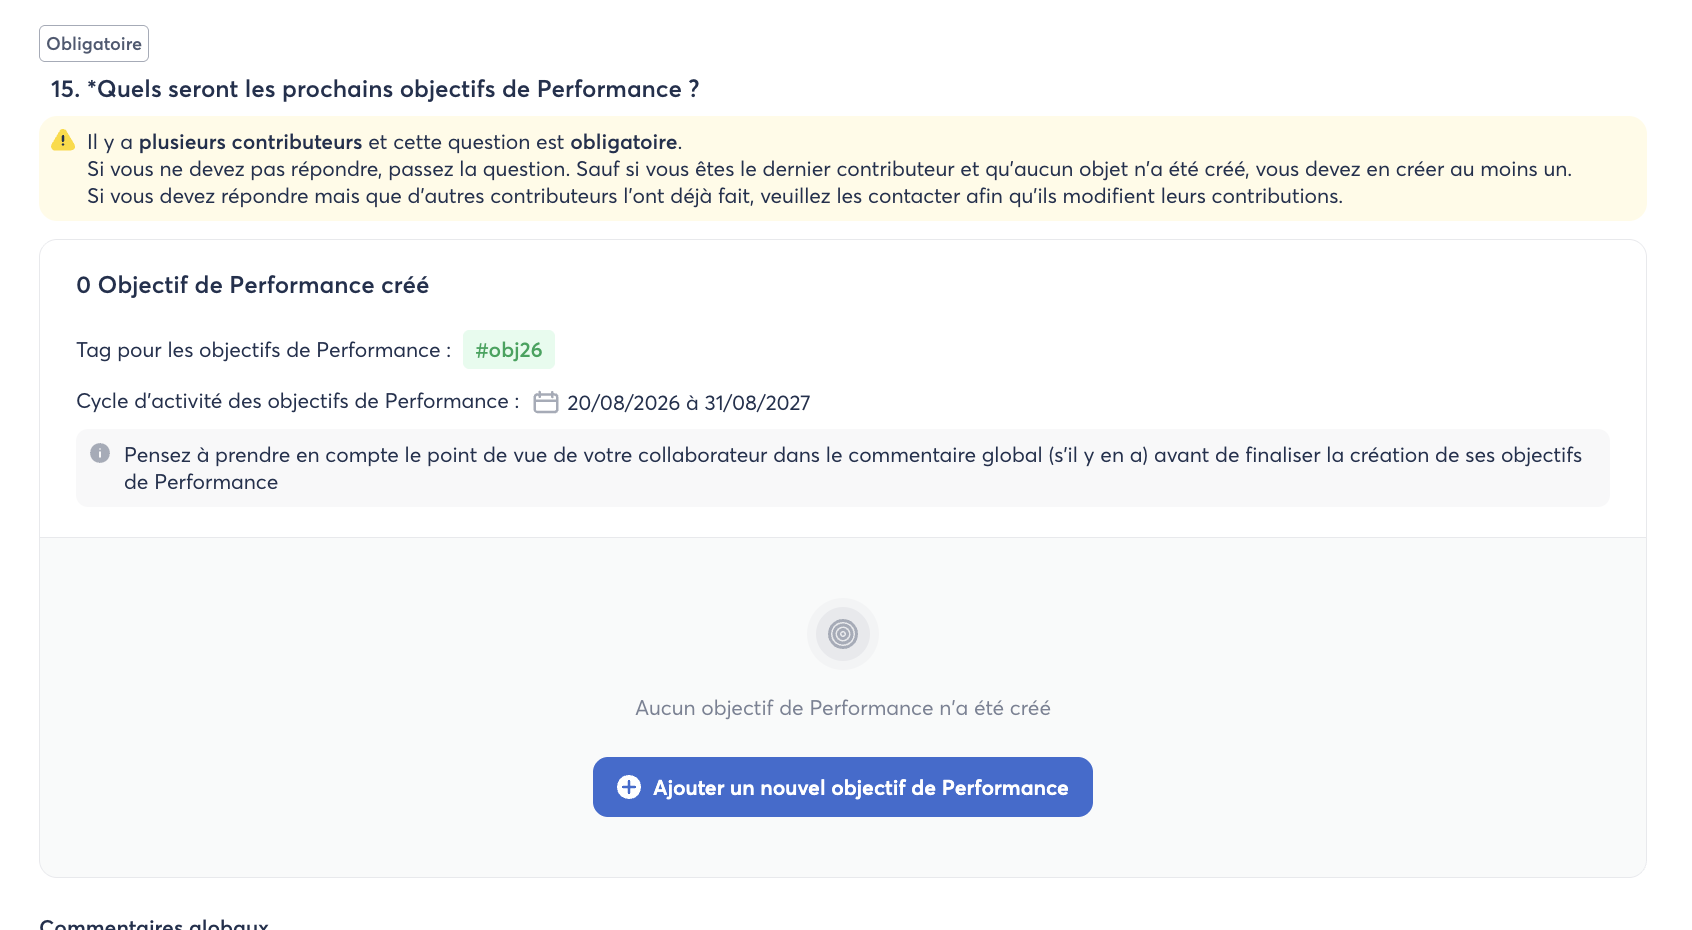
If the review template includes a Performance Goals question, you can create goals for the employee directly from the review.
ℹ️ Note: This section only appears if it has been enabled by your HR team when configuring the template. Depending on the configuration, the employee may have left a comment suggesting goals for the next period — make sure to review these suggestions before creating your own goals.
Step 3 – Create a Performance Goal
- Locate the Performance Goals question in the template.
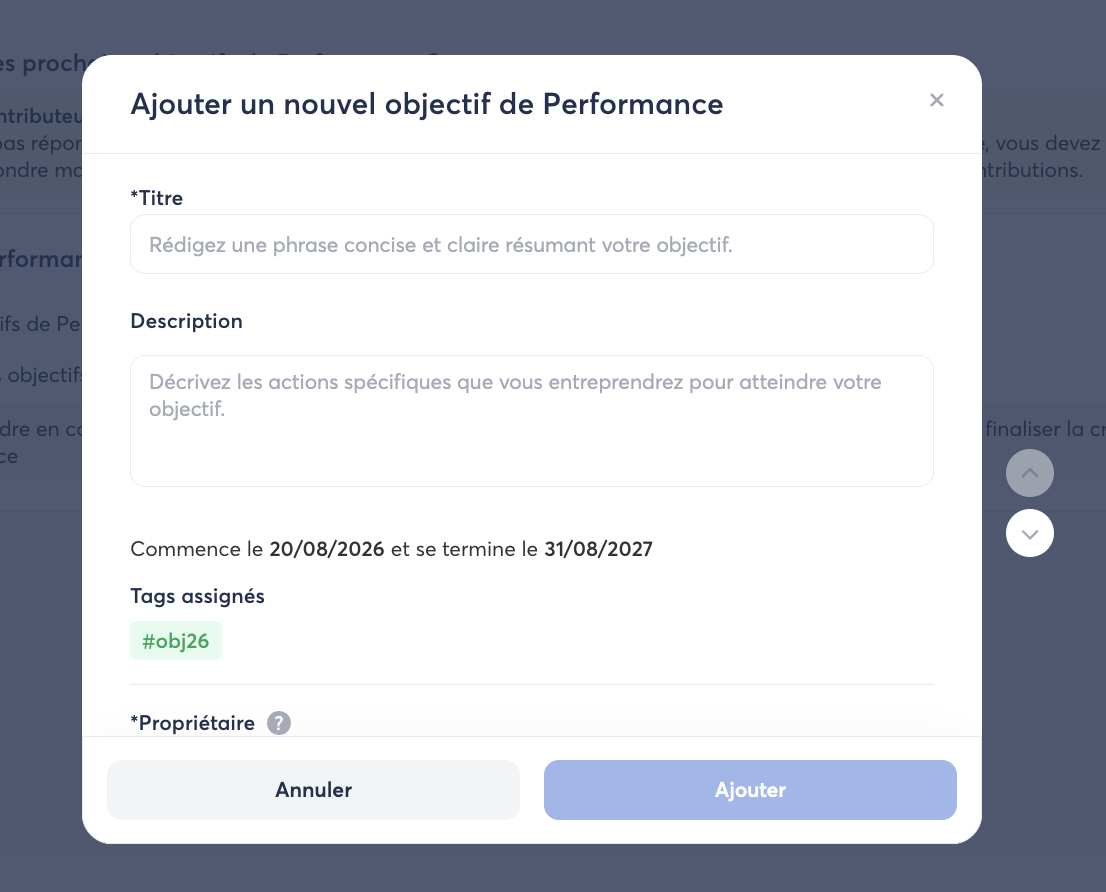
- Click Add a new Performance Goal.
- Enter the requested information (title, activity cycle, etc.).
- Review any comment left by the employee before validating.
⚙️ Evaluating Performance Goals (if configured)
If the template includes a Performance Goals evaluation question, you can review the employee's self-assessment and provide your own evaluation for each goal.
Step 4 – Evaluate a Performance Goal
- Locate the list of Performance Goals in the template.
- Click Evaluate next to the relevant goal.
- In the window that opens, enter the completion rate using the slider or by directly entering the percentage (it is possible to exceed 100%).
- Add a comment if you wish.
- Click Save to record the evaluation.
ℹ️ Note: If there are several goals to evaluate, you can modify the weighting of each one. An automatic calculation then distributes the percentages to reach the maximum overall rate.
⚙️ Evaluating Competencies (if configured)
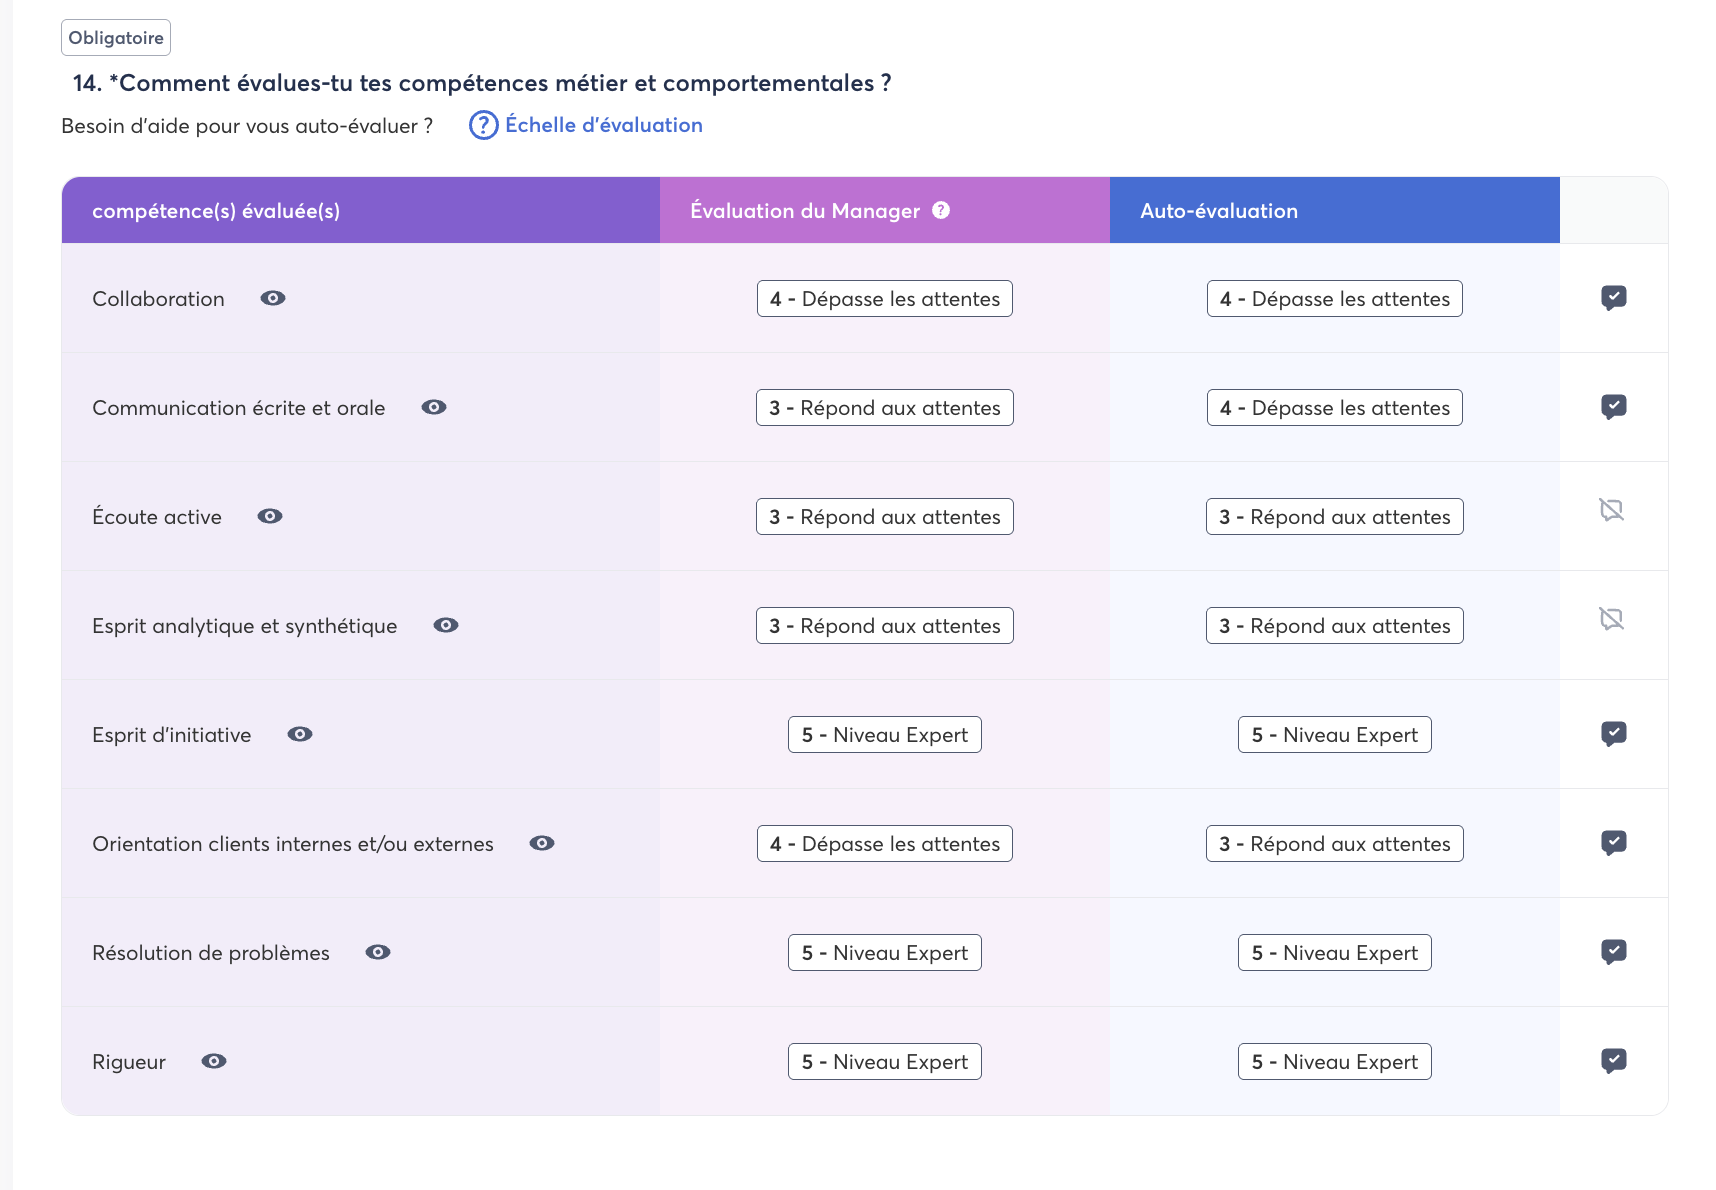
If the template includes a Competency Assessment section, you can evaluate the employee's competency portfolio. Depending on the configuration, the employee may have completed a self-assessment beforehand — their self-assessment will then be displayed alongside yours.
Step 5 – Evaluate Competencies
- Locate the competency section in the template.
- For each listed competency, select your assessment from the Manager Assessment drop-down menu.
- You can add a comment for each competency by clicking the dedicated icon.
- If you want to add a competency that is not included in the list, click Add a competency.
- Enter your final comment in the dedicated field at the bottom of the section.
ℹ️ Note: The final competency assessment remains under your responsibility, even if the employee had the opportunity to complete a self-assessment. The mutual visibility of self-assessments and contributor assessments may vary depending on the configuration — please check with your HR team.
✅ Submit the Contribution
Once you have entered all your comments and assessments, you need to finalize and submit your contribution.
Step 6 – Submit the Contribution
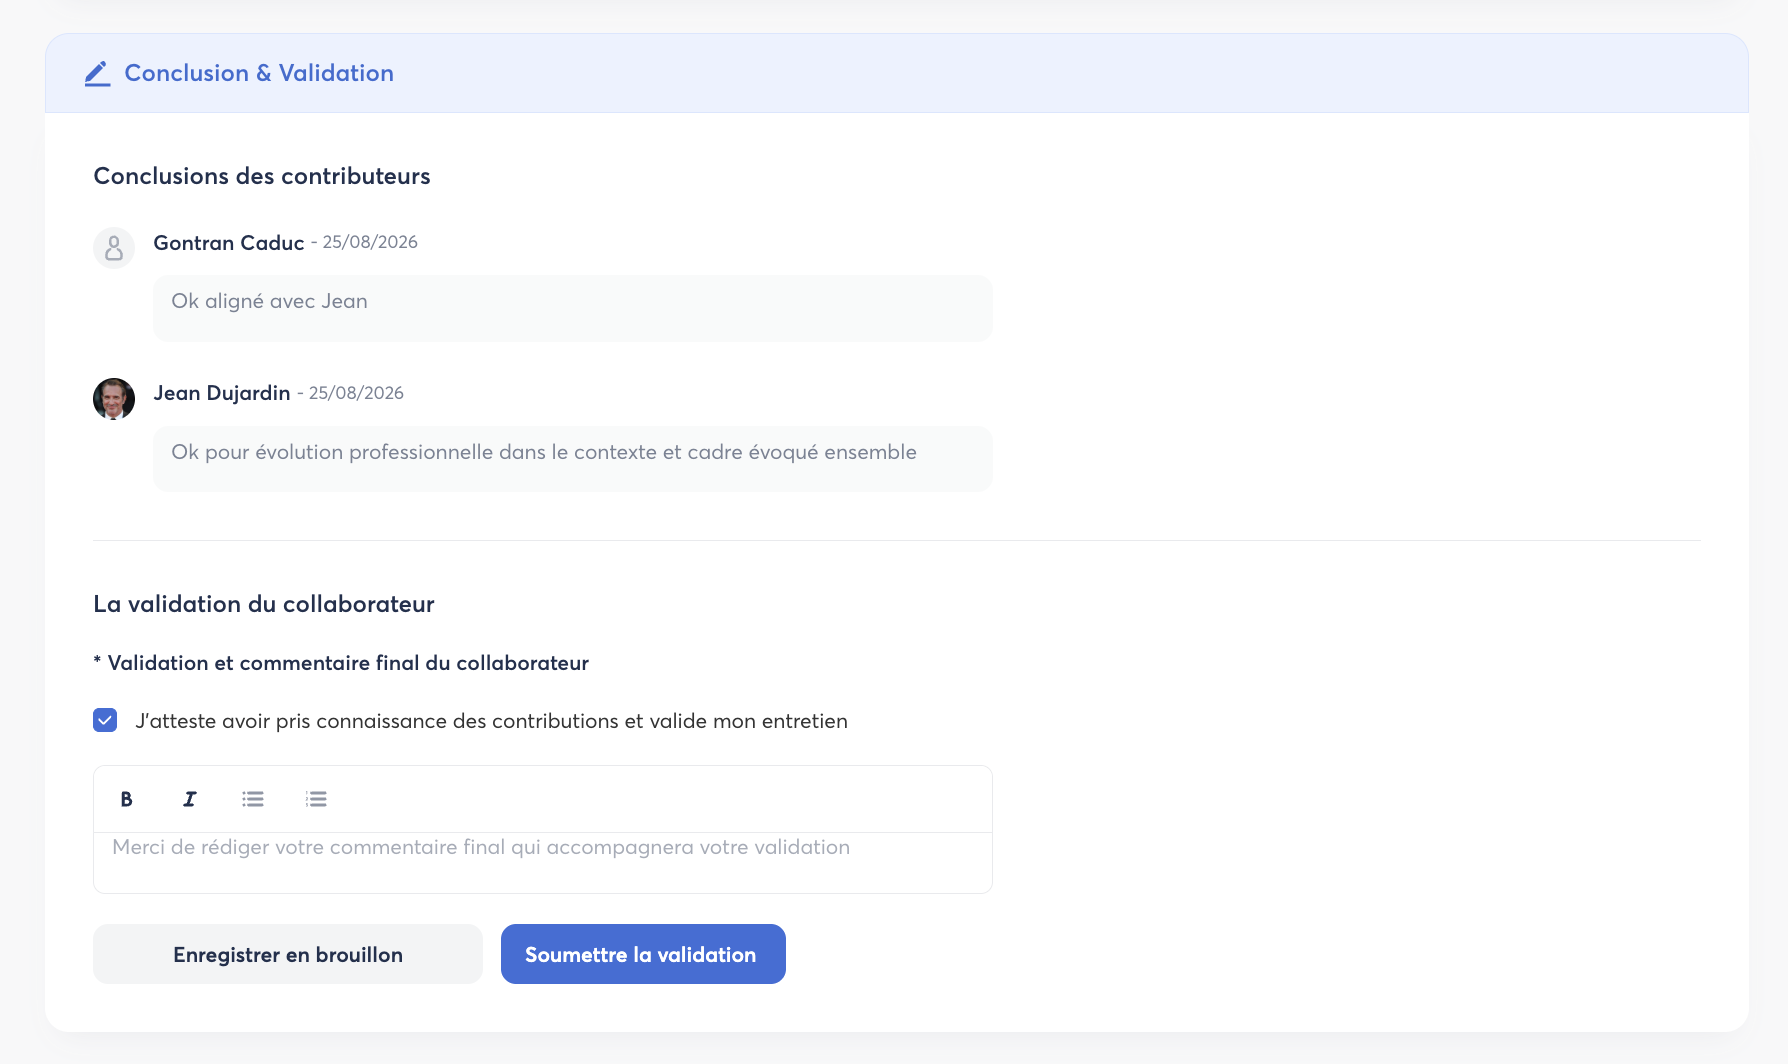
- Scroll down to the Conclusion & Validation section at the bottom of the review.
- Write your overall conclusion in the dedicated text field (formatting available: bold, italics, bullet points).
- Click Submit to finalize your contribution.
⚠️ Good to know: You can Save as draft at any time to save your entries without submitting them. The employee cannot see your contribution while it is still in draft status. You can edit your contribution at any time using the Edit my contribution button, as long as the employee has not yet validated the review and the contribution period is still open.
📧 The Employee Validation Period
Once you have submitted your contribution, the employee receives an email notification informing them that your contribution is available. They can then view it from their Reviews section.
The employee has a specified deadline to submit their validation (visible in their list of reviews). They can then:
- Review your contributions.
- Check the box "I confirm that I have read the contributions and validate my review."
- Add a final comment if the review allows it.
- Click Submit validation.
🤖 AI Summary and PDF Export
Once the review has been validated by the employee, an AI-generated review summary is automatically available in your contributor view. This summary covers the key points of the review in three sections: past objectives review, upcoming objectives, and overall summary.
You can export the review as a PDF by clicking the Export to PDF button available in the top-right corner of the review view.