Before fully deploying the Mood feature in Zest, certain settings must be reviewed and configured in the Back Office, particularly SOS management, which is essential to ensure fast and secure handling of sensitive situations.
✅ Steps Before Activation
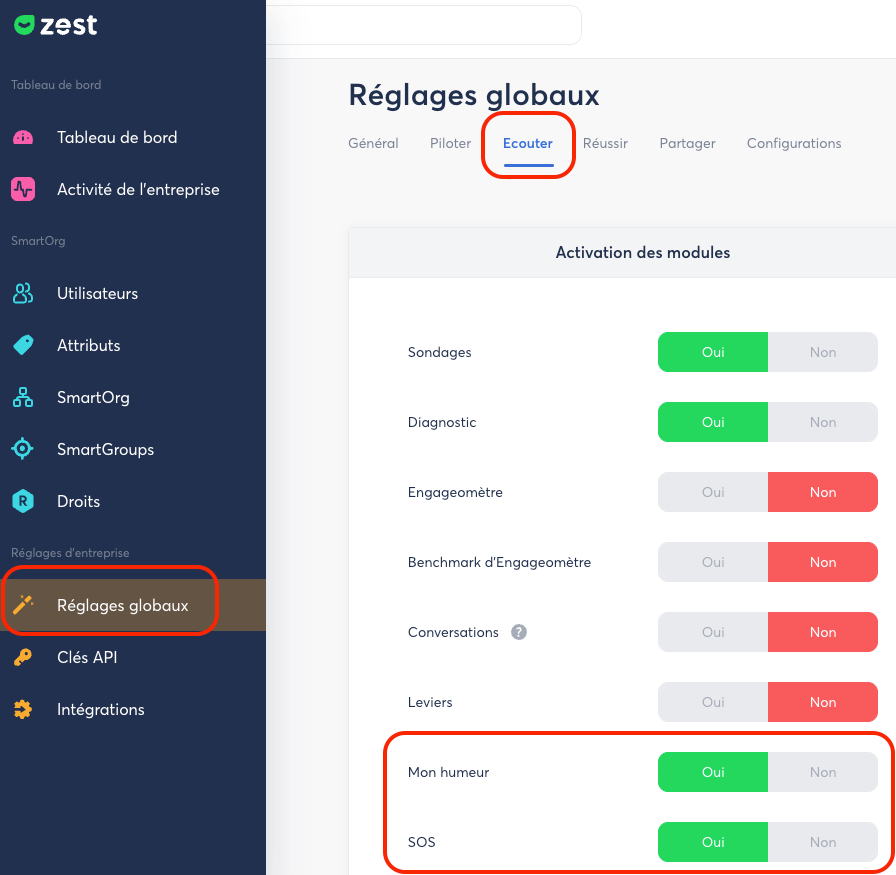
- Enable the Mood feature
👉 Back Office > Global Settings > Listen
- Enable the SOS feature (optional but recommended)
👉 Back Office > Global Settings > Listen
- Configure Mood-specific settings
👉 Back Office > Global Settings > Listen
⚙️ Available Configuration Options
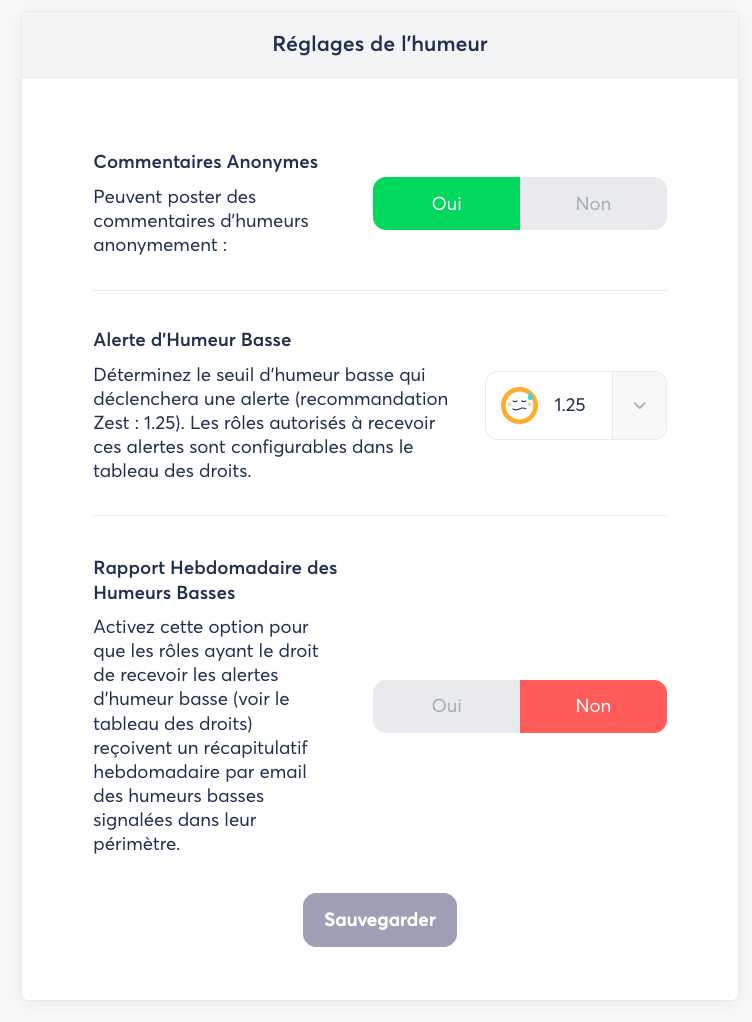
- Anonymous comments
Allow employees to leave mood comments anonymously.
- Low mood alert
Define an alert threshold to be notified when an employee reports a low mood.
- Weekly low mood report
Automatically receive a report if you have the required access rights.
🚨 Configure the Trusted Person Who Receives SOS Alerts
Configuring the SOS recipient is a key step.
📍 Where to Configure the SOS Recipient?
👉 Back Office > Settings > Listen
Go to the SOS section, located in the middle of the page.
✉️ Recipient Email Address
- Enter the email address of the trusted person who will receive SOS notifications.
- ⚠️ Only one email address can be entered.
👥 If Multiple People Need to Receive SOS Alerts
If several people must be notified, we recommend:
- Creating a shared mailbox (e.g., [email protected]) with your email provider.
- Creating a dedicated user in Zest using this address.
- Filling in the first and last name fields
(example: “Jean-Baptiste – SOS Unit”).
- Inviting this account to set up its Zest password, so it can:
- access SOS-related information,
- review and handle reports securely.
👉 This approach ensures continuity of handling, even if one contact person is unavailable.
🔐 Access Management
To customize access to these features, refer to the permissions matrix:
👉 Back Office > Permissions (blue banner on the left)
This allows you to define which roles can access the various Mood-related options.
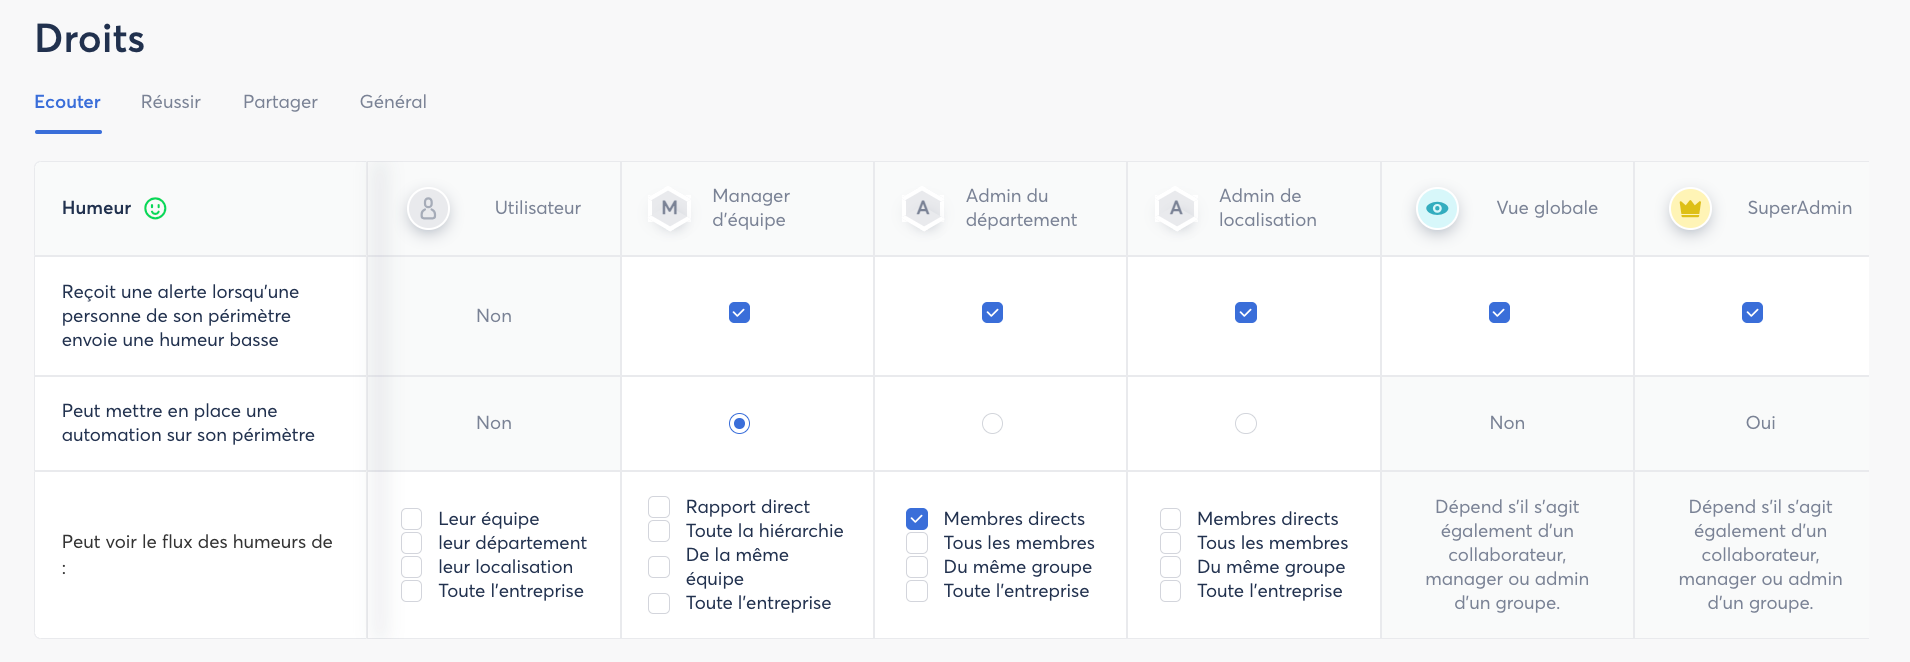
🧑💻 Employee (User)
Employees can:
- report their mood (via automation or spontaneously),
- add a comment or not,
- choose anonymous or non-anonymous sharing.
However:
- they never receive alerts,
- they cannot create automations,
- their visibility into others’ moods is limited, depending on assigned rights:
- no visibility rights,
- visibility over their department,
- visibility over their location,
- visibility over the entire company.
👉 Employees express themselves, but do not supervise.
👥 Team Manager
Depending on assigned permissions, managers can:
- receive alerts in case of low mood within their scope,
- set up mood automations,
- view moods within their managerial perimeter.
Possible visibility levels include:
- Direct reports: their N-1,
- Entire hierarchy: N-1, N-2, N-3, etc.,
- Same team: managers within the same team,
- Entire company.
🛠️ Department / Location Administrator
Depending on permissions, administrators can:
- receive low mood alerts,
- configure mood automations,
- access a broader and structured view of moods.
Possible visibility levels include:
- Direct members: employees directly attached to the managed group,
- All members: direct members + members of subgroups,
- Same group: other administrators of the managed group,
- Entire company.
👥 Best Practices
Depending on the selected settings, remember to communicate in advance with your teams to avoid surprises or misunderstandings. Transparency = trust!